How to Effortlessly Change Your Ceiling Fan Light Bulb
Maintaining a well-lit and comfortable living space often involves changing light bulbs in various fixtures, including ceiling fans. While this task may seem daunting at first, it's a straightforward process that can be completed safely and efficiently by following a few simple steps. In this comprehensive guide, we'll walk you through the essential aspects of changing a ceiling fan light bulb, ensuring a well-illuminated ambiance in your home.
Safety Precautions
Before embarking on this task, it's imperative to prioritize safety. Ensure the power supply to the ceiling fan is switched off at the circuit breaker or fuse box to prevent any electrical hazards. Allow the fan to come to a complete standstill before proceeding further.
Gather Necessary Tools
To change the light bulb effectively, you'll need a few basic tools: a stepladder or stool for elevation, a new light bulb compatible with your ceiling fan, and a pair of needle-nose pliers or a small screwdriver (optional). With these tools at hand, you're ready to begin the process.
Access the Light Bulb
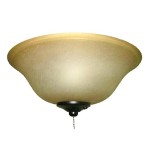
Ceiling fans typically feature a glass globe or shade that encloses the light bulbs. To access the light bulb, gently pull down on the globe or unscrew the shade by turning it counterclockwise. Be careful not to apply excessive force, as the glass can be fragile.
Remove the Old Light Bulb
Once the globe or shade is removed, you'll have direct access to the light bulb. Grasp the bulb firmly and turn it counterclockwise to loosen and detach it from the socket. If the bulb is stubborn, use needle-nose pliers or a small screwdriver to gently pry it loose. Dispose of the old bulb responsibly.
Install the New Light Bulb
Take the new light bulb and align it with the socket. Carefully screw the bulb clockwise into the socket until it's snug. Avoid overtightening to prevent damage to the bulb or socket. Ensure the bulb is securely fastened, as any loose connections can lead to flickering or other issues.
Reassemble the Fixture
With the new light bulb installed, it's time to reassemble the fixture. If you removed a globe, gently place it back over the light bulb and push it upwards to secure it. If you unscrewed a shade, screw it back into place by turning it clockwise.
Restore Power and Test
Once the fixture is reassembled, restore power to the ceiling fan by switching it on at the circuit breaker or fuse box. The new light bulb should illuminate immediately. Observe the fan for a few minutes to ensure the bulb is functioning correctly and there are no flickering or other issues.
Conclusion
Changing a ceiling fan light bulb is a straightforward and achievable task that can significantly enhance the lighting in your home. By following these simple steps and adhering to safety precautions, you can effortlessly maintain a well-lit and inviting atmosphere. Remember to always consult your ceiling fan's user manual for specific instructions or recommendations regarding bulb replacement.

4 Ways To Replace A Light Bulb In Ceiling Fan Wikihow

4 Ways To Replace A Light Bulb In Ceiling Fan Wikihow

4 Ways To Replace A Light Bulb In Ceiling Fan Wikihow

4 Ways To Replace A Light Bulb In Ceiling Fan Wikihow

4 Ways To Replace A Light Bulb In Ceiling Fan Wikihow

How Do I Change This Lightbulb Bunnings Work Community

How To Replace A Ceiling Fan Light Kit Smafan Com

How To Change A Light Bulb In Ceiling Fan With Dome Homes Valy

How To Change The Light Bulb On This Ceiling Fan R Howto

How To Open This Ceiling Fan Change The Light Bulb R Fixit
Related Posts

