How to Install a Hampton Bay LED Ceiling Light
Hampton Bay LED ceiling lights are a great way to add style and energy efficiency to your home. They are easy to install and can be used in a variety of applications, from kitchens and bathrooms to bedrooms and living rooms. Here are the essential steps on how to install a Hampton Bay LED ceiling light:
Step 1: Gather your materials
Before you begin, you will need to gather the following materials:
- Hampton Bay LED ceiling light
- Phillips head screwdriver
- Wire strippers
- Electrical tape
- Safety glasses
- Gloves
Step 2: Safety first
Before you start working on the electrical system, it is important to turn off the power to the circuit that you will be working on. You can do this by flipping the circuit breaker or removing the fuse for that circuit.
Step 3: Remove the old light fixture
If there is an existing light fixture in the location where you want to install the Hampton Bay LED ceiling light, you will need to remove it. To do this, simply unscrew the screws that hold the light fixture in place and remove it from the ceiling.
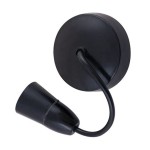
Step 4: Install the mounting bracket
The next step is to install the mounting bracket for the Hampton Bay LED ceiling light. The mounting bracket is typically included with the light fixture. Simply hold the mounting bracket up to the ceiling and mark the locations of the mounting holes. Then, drill pilot holes for the mounting screws and secure the mounting bracket to the ceiling using the screws provided.
Step 5: Connect the wires
Now it is time to connect the wires from the Hampton Bay LED ceiling light to the wires in the ceiling. To do this, first strip about 1/2 inch of insulation from the ends of the wires. Then, twist the bare wires together and wrap them with electrical tape. Be sure to connect the black wire from the light fixture to the black wire in the ceiling, the white wire from the light fixture to the white wire in the ceiling, and the green or bare wire from the light fixture to the green or bare wire in the ceiling.
Step 6: Install the light fixture
Once the wires are connected, you can install the Hampton Bay LED ceiling light. Simply lift the light fixture up to the mounting bracket and twist it clockwise until it is secure.
Step 7: Turn on the power
Finally, turn on the power to the circuit and test the light fixture to make sure that it is working properly.
Congratulations! You have now successfully installed a Hampton Bay LED ceiling light. Enjoy your new energy-efficient lighting!

Hampton Bay 11 In Round White Exterior Outdoor Motion Sensing Led Ceiling Light 5 Color Temperature Options Wet Rated 830 Lumens 564281021 The Home Depot

Hampton Bay 9 In Round White Indoor Outdoor Led Flush Mount Ceiling Light Adjustable Cct 600 Lumens Wet Rated Front Or Side Door 564291020 The Home Depot

Swap To Brighter Led Light In Ceiling Fan Doityourself Com Community Forums

Hampton Bay 13 In Brushed Nickel Selectable Led Flush Mount 2 Pack Jxm3011l Bn The Home Depot

Hampton Bay Clement Round Flat Panel 13 In Black Indoor Integrated Led Flush Mount With Color Changing And Night Light Fp13 3cct Nl Hd The Home Depot

Hampton Bay Flaxmere 11 8 Inches Brushed Nickel Finish Led Flush Mount Ceiling Light New Open Box Com

Hampton Bay Ceiling Fan Light Kit 11 Inch Warm Bright Led Universal White

Hampton Bay 13 In Oil Rubbed Broe Color Changing Led Ceiling Flush Mount Jju3011l 4 The Home Depot

Successful Hampton Bay Ceiling Fan Installation Projects Stories Smartthings Community

Hampton Bay Williamson Led Ceiling Fan Light Kit Cottage Brushed Nickel
Related Posts