Wiring Up A Ceiling Pendant: A Comprehensive Guide
Installing a ceiling pendant light is a relatively simple task that can add a touch of style and functionality to any room. However, it's important to make sure the installation is done correctly to avoid electrical hazards.
In this guide, we'll walk you through the essential steps of wiring up a ceiling pendant light, including:
- Choosing the right materials
- Preparing the wiring
- Installing the ceiling rose
- Connecting the pendant light
- Testing the light
1. Choosing the Right Materials
The first step is to choose the right materials for the job. You'll need:
- A ceiling pendant light
- A ceiling rose
- Electrical wire (at least 1.5mm thick)
- Wire strippers
- Screwdriver
- Pliers
- Electrical tape
2. Preparing the Wiring
Once you have all of your materials, you need to prepare the wiring. Start by cutting the electrical wire to the desired length. The wire should be long enough to reach from the ceiling rose to the pendant light, with a little bit of slack.
Next, strip the ends of the wire about 1/2 inch. This will expose the copper wires inside.
3. Installing the Ceiling Rose
The ceiling rose is the part of the light that attaches to the ceiling. It houses the electrical connections and provides a cover for the wires.
To install the ceiling rose, follow these steps:
- Turn off the power to the circuit that you'll be working on.
- Remove the existing ceiling light (if there is one).
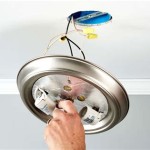
- Connect the wires from the ceiling to the terminals on the ceiling rose. The live wire (usually red or brown) should be connected to the terminal marked "L". The neutral wire (usually blue or black) should be connected to the terminal marked "N". The earth wire (usually green or yellow) should be connected to the terminal marked "E".
- Secure the ceiling rose to the ceiling using the screws provided.
4. Connecting the Pendant Light
Now it's time to connect the pendant light to the ceiling rose. To do this, follow these steps:
- Feed the wires from the pendant light through the hole in the ceiling rose.
- Connect the wires from the pendant light to the terminals on the ceiling rose. The live wire should be connected to the terminal marked "L". The neutral wire should be connected to the terminal marked "N".
- Secure the pendant light to the ceiling rose using the screws provided.
5. Testing the Light
Once the pendant light is installed, it's important to test it to make sure it's working properly. To do this, simply turn on the power to the circuit and switch on the light.
If the light doesn't come on, check the following:
- Make sure that the power is turned on.
- Check that the wires are connected correctly.
- Check that the bulb is working.
If you're still having trouble, it's best to call a qualified electrician for help.

Inside The Circuit Pendant Lighting Light Switch Wiring Homeowner Faqs

Jim Lawrence Flush Lights Fitting Guide

Jim Lawrence Pendant Lights Fitting Guide

How To Hang A Ceiling Light

How To Wire A Light Switch And Ceiling Rose Diy Doctor

Extending A Lighting Circuit Step By Guide And

Wiring A Ceiling Fan And Light With Diagrams Ptr

Changing A Light Fitting

Adding An Extra Light From A Switch

Extending A Lighting Circuit Step By Guide And
Related Posts


