Hunter Ceiling Fan Remote Setup: A Step-by-Step Guide
Installing and setting up a Hunter ceiling fan remote can provide an easy and convenient way to control your fan's speed, direction, and other features from anywhere in the room. Here's a comprehensive guide to help you through the process:
1. Safety First
Before you start, ensure your ceiling fan is turned off and the power is disconnected at the circuit breaker or fuse box. This will prevent the risk of electrical shock during installation.
2. Prepare the Remote
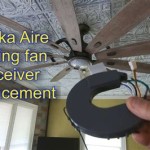
Unpack your Hunter ceiling fan remote and its receiver module. The receiver module will need to be connected to your fan's wiring. Locate the appropriate wires in your fan's canopy and connect them to the corresponding terminals on the receiver module. Secure the connections with wire nuts.
3. Install the Receiver Module
Mount the receiver module inside your fan's canopy or a convenient location nearby. Use the included screws or double-sided tape for secure attachment.
4. Reset the Remote
Before pairing the remote with the receiver module, reset it to factory settings. Press and hold the reset button (usually located on the back of the remote) for 5-10 seconds until the LED indicator flashes.
5. Pair the Remote and Receiver
With the receiver module installed and the remote reset, it's time to pair them. Position the remote towards the receiver module and press the "Sync" button on both devices simultaneously. Wait for the LED indicators on both units to flash rapidly, indicating successful pairing.
6. Program the Remote (Optional)
Some Hunter ceiling fan remotes come with programmable buttons that allow you to create fan speed, light dimming, or other custom settings. Follow the instructions in your remote's user manual to set up these personalized features.
7. Finishing Touches
Once everything is connected and programmed, turn on the power to your ceiling fan. Your remote should now be fully operational. Check the fan's operation at different speeds and directions to ensure proper functionality.
Troubleshooting Tips
If you encounter any issues during the setup process, here are some common troubleshooting tips:
- Ensure the power is disconnected before making any connections.
- Check all wire connections for loose or incorrect wiring.
- Reset both the remote and receiver module if pairing fails.
- Replace the batteries in the remote if the LED indicator doesn't light up.
- Contact Hunter customer support for assistance with any unresolved issues.
By following these steps, you can successfully set up your Hunter ceiling fan remote and enjoy the convenience of controlling your fan effortlessly.

Hunter Universal 3 Sd Damp Rated Ceiling Fan Handheld Remote Control White 99392 The Home Depot

Universal Fan Light Remote Control With Receiver 99770 Hunter

Techne With 4 Lights 52 Inch Ceiling Fan Hunter

How To Program A Hunter Ceiling Fan Remote Fans

Universal Fan Light Remote Control With Receiver 99770 Hunter

On Off Handheld Remote With Receiver 99772 Hunter Fan

Hunter 99370 Ceiling Fan Remote Control User Manual

Hunter Universal 1 38 In 3 Sd Dove Grey Plastic Indoor Ceiling Fan Remote The Accessories Department At Com

How Do I Install New Hunter Ceiling Fan With Remote Control And Still Have Switch Wall For The Light Separately R Homemaintenance

Hunter Channing 54 In Express Indoor Noble Broe Ceiling Fan With Remote And Light Kit Included 53366 The Home Depot
Related Posts


