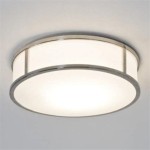
Installing A New Ceiling Light: Essential Aspects
Replacing a ceiling light is a common home improvement task that can be completed in a few simple steps. Whether you're updating the look of your room or replacing a faulty fixture, installing a new ceiling light can enhance the ambiance and functionality of your space. Here's a comprehensive guide to help you through the process:
Materials and Tools Required:
- New ceiling light fixture
- Screwdriver
- Electrical tape
- Wire strippers
- Ladder
- Safety glasses
Safety Precautions:
Before starting the installation, ensure safety by following these precautions:
- Turn off the power to the light fixture at the circuit breaker or fuse box.
- Wear safety glasses to protect your eyes from debris.
- Use a ladder with a sturdy base and non-slip feet.
Step-by-Step Installation:
Step 1: Remove the existing light fixture
Using a screwdriver, unscrew the mounting screws that hold the light fixture in place. Carefully detach the fixture from the ceiling junction box. Disconnect the wires by unscrewing the wire nuts and separating them. Wrap the disconnected wires with electrical tape for safety.
Step 2: Prepare the new light fixture
Unpack the new light fixture and gather all the necessary parts. If the fixture requires assembly, follow the manufacturer's instructions.
Step 3: Connect the wires
Identify the black (hot) and white (neutral) wires in both the ceiling junction box and the new light fixture. Connect the black wire from the fixture to the black wire in the junction box using a wire nut. Twist the wires together firmly and cover them with the wire nut. Repeat this process for the white wires.
Step 4: Mount the new light fixture
Lift the new light fixture to the ceiling junction box and align the mounting bracket with the holes. Thread the fixture's mounting screws through the holes and tighten them securely using a screwdriver.
Step 5: Install the bulbs and shade
Screw the light bulbs into the fixture's sockets. If the fixture has a shade, attach it according to the manufacturer's instructions.
Step 6: Turn on the power and check
Return to the circuit breaker or fuse box and turn on the power. Flip the light switch to test if the new light fixture is working properly.
Tips for a Successful Installation:
- Choose a light fixture that complements the style and size of your room.
- Consider the height of the ceiling and the desired amount of light output.
- Use wire connectors instead of electrical tape for a secure and long-lasting connection.
- If you encounter any electrical issues, contact a licensed electrician for assistance.
Installing a new ceiling light is a straightforward task that can enhance both the aesthetics and functionality of your home. By following these steps and safety precautions, you can confidently update your lighting fixtures and create a more inviting ambiance.

How To Install Ceiling Light Homeserve Usa

How To Install A Ceiling Light Fixture Diy Family Handyman

Mounting Light Fixtures Fine Homebuilding

How To Install A Ceiling Light Fixture Diyer S Guide Bob Vila

How To Install A Ceiling Light Fixture 7 Easy Steps Diy
:max_bytes(150000):strip_icc()/installing-a-pendant-light-2175009-01-ed4c5a36391942b683ab0a5e7b5361b9.jpg?strip=all)
How To Install A Pendant Light

How To Install A Ceiling Light Fixture Diy Family Handyman

How To Replace A Ceiling Light Fixture Stanley Tools

How To Install A Pendant Light Simple Step By Guide

How To Replace A Ceiling Fan With Pendant Light
Related Posts


