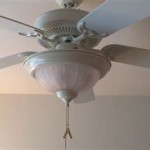
Hunter Ceiling Fan Flush Mount Instructions: A Comprehensive Guide
Hunter ceiling fans, renowned for their quality and performance, offer homeowners a versatile and stylish way to enhance comfort and ambiance within their living spaces. Flush mount ceiling fans, specifically designed to sit close to the ceiling, provide optimal airflow without compromising space or aesthetics. Installing a Hunter flush mount ceiling fan can seem daunting, but with proper guidance, it is a manageable task that can be completed with precision and ease.
Materials Required
Before embarking on the installation process, gather the necessary materials:
- Hunter flush mount ceiling fan
- Screwdriver
- Wire strippers
- Electrical tape
- Safety glasses
- Step ladder
Safety Precautions
To ensure a safe and successful installation, always prioritize safety. Wear safety glasses and turn off the power at the circuit breaker panel before beginning any electrical work. If you're not comfortable working with electricity, seek assistance from a qualified electrician.
Step-by-Step Instructions
Follow these comprehensive steps to install your Hunter flush mount ceiling fan:
1. Prepare the Electrical Box
Locate the electrical box on the ceiling and ensure that it is securely mounted. If the box is not securely fastened, reinforce it using the provided hardware
2. Mount the Mounting Bracket
Align the mounting bracket with the electrical box and secure it using the provided screws. Ensure the bracket is level and firmly attached.
3. Wire the Fan
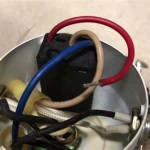
Connect the fan's wires (usually black, white, and green) to the corresponding wires in the electrical box. Match black to black, white to white, and green to ground (usually bare copper wire). Use wire strippers to expose approximately 1/2 inch of wire and twist the ends together. Secure the connections with electrical tape.
4. Install the Fan
Carefully lift the fan onto the mounting bracket. Secure the fan to the bracket using the provided screws. Ensure that the fan is level and stable.
5. Attach the Blades
Slide the fan blades onto the motor housing and secure them according to the manufacturer's instructions. Use the provided screws or pins to ensure a snug fit.
6. Install the Light Fixture (Optional)
If your flush mount ceiling fan includes a light fixture, connect the light wires as you did the fan wires (black to black, white to white, green to ground). Install the light fixture according to the manufacturer's instructions.
7. Restore Power and Test
Restore power at the circuit breaker panel and turn on the fan. Check if the fan is running smoothly and the light (if applicable) is working correctly.
Troubleshooting Tips
If you encounter any issues during installation, refer to these troubleshooting tips:
- Ensure all electrical connections are secure and not loose.
- Verify that the mounting bracket is securely attached to the electrical box.
- Check if the fan blades are properly balanced. Unbalanced blades can cause wobbling.
- If the fan is making humming or grinding noises, ensure that all screws and bolts are tightened securely.
Professional Installation Tips
Consider these additional tips to elevate your Hunter flush mount ceiling fan installation to a professional level:
- Use a torque wrench to tighten all screws and bolts to the specified torque values.
- Apply thread-locking compound to the mounting screws to prevent loosening over time.
- For maximum safety and durability, hire a licensed electrician to perform the installation.
Conclusion
Installing a Hunter flush mount ceiling fan can significantly enhance the comfort and style of your home. By following these detailed instructions, you can confidently tackle this task yourself. Remember to prioritize safety, follow the steps meticulously, and refer to the troubleshooting tips or seek professional assistance if necessary. With a properly installed Hunter ceiling fan, you can enjoy refreshing airflow, improved lighting, and a touch of elegance in your living space for years to come.

Hunter Alexander 44 Inch Indoor Flush Mount Ceiling Fan Installation Guide

Hunterexpress Easy Installation Ceiling Fan Hunter

Installation Instructions For Hunter Original Ceiling Fans Fan

Hunter 51491 Riesling 52 Inch Noble Broe Led Indoor Downrod Or Flush Mount Ceiling Fan Installation Guide

Hunter Cedar Key 52 In Indoor Outdoor Matte Black Low Profile Ceiling Fan With Light Kit And Handheld Remote Control 55080 The Home Depot

Hunter Minikin 44 In Indoor Fresh White Flush Mount Ceiling Fan With Light Kit 51140 The Home Depot

Dempsey Low Profile With Light 44 Inch Ceiling Fan Hunter

Hunter Bennett 52 In Matte Black Led Indoor Flush Mount Ceiling Fan With Light Remote 5 Blade The Fans Department At Com

Hunter Fan 3 Light Flush Mount Fitter Kit

Hunter Ceiling Fan Add On Light Kit 3 Flush Mount Home Commercial Heaters Ventilation Fans
Related Posts


