How to Fit Recessed Ceiling Downlight
Recessed ceiling downlights are a great way to add stylish and efficient lighting to your home. They can be used in any room of the house, and they come in a variety of styles and finishes to match any décor. If you're thinking about installing recessed downlights in your home, here's a step-by-step guide to help you get started.
1. Gather your materials
Before you start, you'll need to gather all of the materials you'll need. This includes:
- Recessed downlights
- Electrical wire
- Wire nuts
- Junction box
- Drywall saw
- Drill
- Screwdriver
2. Prepare the ceiling
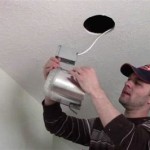
The first step is to prepare the ceiling for the downlights. This involves cutting holes in the drywall for the lights and running the electrical wire from the junction box to each light. To cut the holes, use a drywall saw to cut a circle the same size as the downlight you're installing. Once you've cut the holes, feed the electrical wire through the holes and into the junction box.
3. Install the junction box
The junction box is the central point where all of the electrical wires from the downlights will be connected. To install the junction box, first, you'll need to find a location for it in the ceiling. The junction box should be located in a place where it will be accessible for future maintenance. Once you've found a location for the junction box, use the drill to make a hole for the box. Then, insert the junction box into the hole and secure it with screws.
4. Connect the electrical wires
Once the junction box is installed, you'll need to connect the electrical wires from the downlights to the junction box. To do this, use wire nuts to connect the wires together. Make sure that the wires are connected correctly, and that the connections are tight. Once the wires are connected, tuck the wires into the junction box and secure the cover.
5. Install the downlights
Now that the electrical wires are connected, you can install the downlights. To do this, simply insert the downlight into the hole you cut in the drywall. The downlight should fit snugly into the hole, but don't force it. Once the downlight is in place, use the screwdriver to tighten the screws that hold the downlight in place.
6. Turn on the lights
Once the downlights are installed, you're ready to turn them on. Flip the switch for the lights and enjoy your new lighting.
Tips
Here are a few tips to help you install recessed ceiling downlights:
- Make sure that you turn off the power to the room before you start working on the lights.
- Use a level to make sure that the downlights are installed evenly.
- If you're not sure how to do something, consult an electrician.

Simple Ways To Fit Downlights 15 Steps With Pictures Wikihow

How To Install Recessed Lighting The Home Depot

Simple Ways To Fit Downlights 15 Steps With Pictures Wikihow

How To Install Recessed Lighting Fixthisbuildthat

Energy Star Ask The Experts S

How To Install Recessed Lighting The Home Depot

Install Recessed Lighting

How To Change A Recessed Or Canned Light Bulb

An Easy Inexpensive Way To Replace Your Old Recessed Lights With No Rewiring Making It In The Mountains

Tips For Choosing Installing Recessed Lighting
Related Posts

