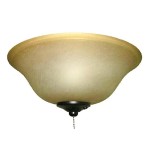
How to Replace a Ceiling Fan with Remote
Ceiling fans are a great way to cool down a room and improve air circulation. They can also add a touch of style to your décor. If you're looking to replace an old ceiling fan or install a new one, here's a step-by-step guide to help you get the job done.
Materials You'll Need
* New ceiling fan * Screwdriver * Electrical tape * Wire nuts * Ladder * Safety glassesSafety First
* Turn off the power to the ceiling fan circuit at the breaker box. * Wear safety glasses to protect your eyes from debris. * Use a ladder that is tall enough to reach the ceiling fan.Step 1: Remove the Old Fan
* Remove the blades from the fan by unscrewing the screws that hold them in place. * Remove the light fixture from the fan by unscrewing the nuts that hold it in place. * Disconnect the wires from the fan by unscrewing the wire nuts. * Remove the mounting bracket from the ceiling by unscrewing the screws that hold it in place.Step 2: Install the New Mounting Bracket
* Position the new mounting bracket on the ceiling and mark the location of the screw holes. * Drill pilot holes for the screws. * Insert the screws into the pilot holes and tighten them until the mounting bracket is secure.Step 3: Connect the Wires
* Connect the black wire from the fan to the black wire from the ceiling. * Connect the white wire from the fan to the white wire from the ceiling. * Connect the ground wire from the fan to the green or bare wire from the ceiling. * Twist the wires together and secure them with wire nuts.Step 4: Install the Fan
* Lift the fan onto the mounting bracket and secure it with the screws that came with the fan. * Install the light fixture onto the fan by screwing in the nuts that hold it in place. * Install the blades onto the fan by screwing in the screws that hold them in place.Step 5: Install the Remote Receiver
* The remote receiver is usually a small box that mounts to the ceiling. * Find a location for the receiver that is close to the fan and out of the way of any obstacles. * Mount the receiver to the ceiling using the screws that came with the receiver. * Connect the wires from the receiver to the wires from the fan. * Twist the wires together and secure them with wire nuts.Step 6: Test the Fan
* Turn on the power to the ceiling fan circuit at the breaker box. * Use the remote control to turn on the fan and light. * Make sure that the fan is running smoothly and that the light is working properly.Troubleshooting
* If the fan is not running, check the following: * Make sure that the power is turned on. * Make sure that the wires are connected properly. * Make sure that the remote receiver is installed correctly. * If the light is not working, check the following: * Make sure that the light bulb is installed correctly. * Make sure that the wires are connected properly. * Make sure that the remote receiver is installed correctly.
How To Wire A Ceiling Fan Control Using Dimmer Switch
I Am Installing A Remote To Ceiling Fan Where Does The Red Wire Go Quora

How To Wire A Ceiling Fan Control Using Dimmer Switch

Ceiling Fan Remote With 2 Wires Doityourself Com Community Forums
Universal Ceiling Fan Remote Replacement Ifixit Repair Guide

How Do I Install New Hunter Ceiling Fan With Remote Control And Still Have Switch Wall For The Light Separately R Homemaintenance

Ceiling Fan Wiring Diagram

Converting An Existing Ceiling Fan To A Remote Control

Converting An Existing Ceiling Fan To A Remote Control

Wiring A Ceiling Fan And Light With Diagrams Ptr
Related Posts

