Installing a Ceiling Fan with Remote Control: A Step-by-Step Guide
Elevate the comfort and style of your home with a sleek ceiling fan equipped with remote control. This comprehensive guide will empower you to install your new fan effortlessly, ensuring optimal airflow and convenience.
Before embarking on this project, gather the necessary tools, including a ladder, screwdriver, wire strippers, electrical tape, and a level. Additionally, ensure you have the electrical wiring and junction box in place.
Step 1: Prepare the Electrical Wiring
Locate the junction box and switch off the electrical power at the circuit breaker panel. Use wire strippers to remove approximately half an inch of insulation from the black, white, and green (ground) wires. Connect the black wire to the black wire on the fan, the white wire to the white wire, and the green wire to the green grounding wire on the fan.
Step 2: Mount the Fan Mounting Bracket
Position the mounting bracket onto the junction box and secure it using the provided screws. Ensure the bracket is level using a spirit level.
Step 3: Hang the Fan
Carefully lift the fan and hang it onto the mounting bracket. Tighten the canopy screws to hold it securely in place.
Step 4: Wire the Fan
Once the fan is hanging, connect the black wire from the fan to the black wire on the ceiling, the white wire to the white wire, and the green wire to the green wire. Secure the connections with electrical tape.
Step 5: Install the Blades
Align the blade brackets with the corresponding slots on the fan motor and insert the blades. Tighten the screws to secure each blade firmly.
Step 6: Install the Light Kit (Optional)
If your fan includes a light kit, follow the manufacturer's instructions to install the light bulbs and assemble the light fixture. Connect the wires from the light kit to the electrical wires in the fan and secure the connections with electrical tape.
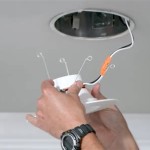
Step 7: Install the Remote Control Receiver
Locate a suitable spot on the ceiling or wall for the remote control receiver. Secure it using screws or double-sided tape. Connect the receiver wires to the wires on the fan and wrap the connections with electrical tape.
Step 8: Finish the Installation
Slide the canopy cover over the mounting bracket and secure it with the provided screws. Restore power at the circuit breaker panel and test the fan's remote control. If everything functions properly, your ceiling fan is ready to enhance your home's comfort and ambiance.

How To Install A Ceiling Fan Remote Diy Family Handyman

How To Wire A Ceiling Fan Control Using Dimmer Switch

How To Install A Ceiling Fan Remote Diy Family Handyman

Trying To Fix A Honeywell Ceiling Fan With Remote Control Installation Please Tell Me What Is Wrong Appreciate The Help R Askanelectrician

How To Install A Ceiling Fan With Remote Control Electrical

How Do I Install New Hunter Ceiling Fan With Remote Control And Still Have Switch Wall For The Light Separately R Homemaintenance

How To Install A Ceiling Fan Remote Extreme Diy

Hunter 3 Sd Handheld Wall Mount Combo Ceiling Fan Light Remote Control Com

Genesis Impex I R Technology Ceiling Fans Remote Control Kit At Rs 650 In Hyderabad

Cenming Universal Ceiling Fan Remote Control Kit Replacement For Harbor Breeze Hampton Bay Hunter Litex 3 Sd Light Dimmer With Fan28r Receiver Replace 53t 2aazpfan53t 11t Kujce9103 Uc7030t Yahoo Ping
Related Posts