How To Wire Ceiling Fan With Light And Switch
Installing a ceiling fan with light and switch can be a great way to add style and functionality to any room. It's a relatively straightforward project that can be completed in a few hours with the right tools and materials. Here's a step-by-step guide on how to wire a ceiling fan with light and switch:
Tools and materials you'll need:
- Ceiling fan with light kit
- Electrical switch
- Wire strippers
- Electrical tape
- Screwdriver
- Drill
- Safety glasses
Step 1: Safety first
Before you begin, make sure to turn off the power to the circuit that you'll be working on. This can be done by flipping the breaker or removing the fuse. Also, wear safety glasses to protect your eyes from any flying debris.
Step 2: Install the ceiling fan bracket
The first step is to install the ceiling fan bracket. This bracket will support the weight of the fan and will be attached to the electrical box in your ceiling. Use the screws that came with the fan to attach the bracket to the electrical box.
Step 3: Wire the fan
Next, you'll need to wire the fan. The fan will have three wires: a black wire, a white wire, and a green wire. The black wire is the hot wire, the white wire is the neutral wire, and the green wire is the ground wire.
Step 4: Connect the switch
Once the fan is wired, you'll need to connect the switch. The switch will have two terminals: a brass terminal and a silver terminal. The brass terminal is the hot terminal and the silver terminal is the neutral terminal.
Connect the black wire from the fan to the brass terminal on the switch. Connect the white wire from the fan to the silver terminal on the switch. Connect the green wire from the fan to the green wire in the electrical box.
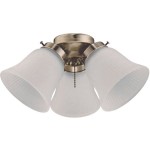
Step 5: Install the light kit
If your fan came with a light kit, you'll need to install it now. The light kit will have a canopy, a light fixture, and bulbs. Attach the canopy to the ceiling fan and then attach the light fixture to the canopy.
Step 6: Turn on the power
Once everything is wired and installed, you can turn on the power to the circuit. The fan should start working and the light should come on.
Tips:
- If you're not comfortable working with electricity, it's best to hire a qualified electrician to install your ceiling fan.
- Make sure to follow the manufacturer's instructions carefully when installing your ceiling fan.
- Use a level to make sure that the ceiling fan is hung evenly.
- Tighten all of the screws and bolts securely.
With these simple steps, you can easily wire a ceiling fan with light and switch. Just be sure to take your time and follow the instructions carefully. Once it's installed, you'll be able to enjoy the benefits of a ceiling fan with light for years to come.

Wiring A Ceiling Fan And Light With Diagrams Ptr

Wiring A Ceiling Fan And Light With Diagrams Ptr

How To Wire A Ceiling Fan And Light Wall Switch Quora

Replace Light Fixture W Ceiling Fan R Askanelectrician

Wiring A Ceiling Fan And Light With Diagrams Ptr

Ceiling Fan Wiring Diagram With Light Dimmer

How To Wire A Ceiling Fan Control Using Dimmer Switch

Wiring A Ceiling Fan And Light With Diagrams Ptr

Ceiling Fan Switch Wiring Electrical 101

How To Wire A Ceiling Fan For Separate Control Fo The And Light
Related Posts