Ledbury glass steel chrome effect 6 lamp ceiling light diy at b q homcom round crystal 7 lights chandelier mounted fixture for living room dining hallway modern inlight roma beaded transpa 3 concept plastic led colours caelus brushed metal chandeliers w stainless base 10 elegant flush mount lighting egeria antique brass goodhome caladane 4 pendant dia 500mm 14 ultim clear bathroom komet 20

Ledbury Glass Steel Chrome Effect 6 Lamp Ceiling Light Diy At B Q

Homcom Round Crystal Ceiling Lamp 7 Lights Chandelier Mounted Fixture For Living Room Dining Hallway Modern Diy At B Q

Inlight Roma Beaded Glass Steel Transpa Chrome Effect 3 Lamp Ceiling Light Diy At B Q

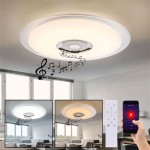
Inlight Concept Modern Plastic Steel Chrome Effect Led Ceiling Light Diy At B Q

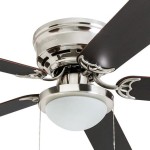
Colours Caelus Brushed Metal Chrome Effect 3 Lamp Ceiling Light Diy At B Q

Homcom Crystal Ceiling Light Modern Chandeliers W Stainless Steel Base 10 Lights Elegant Flush Mount Lighting Diy At B Q

Colours Egeria Brushed Glass Metal Antique Brass Effect 3 Lamp Ceiling Light Diy At B Q

Goodhome Caladane Chrome Effect 4 Lamp Pendant Ceiling Light Dia 500mm Diy At B Q

Colours Caelus Brushed Metal Chrome Effect 14 Lamp Ceiling Light Diy At B Q

B Q Ultim Flush Brushed Glass Metal Clear Chrome Effect 3 Lamp Bathroom Ceiling Light Diy At

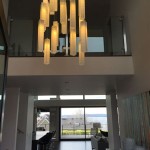
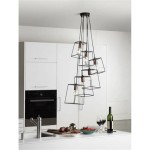
Komet Pendant Chrome Effect 20 Lamp Ceiling Light Diy At B Q

Colours Carmenta Twist Brushed Glass Metal Chrome Effect 6 Lamp Led Ceiling Light Diy At B Q

Colours Cura Brushed Glass Metal Chrome Effect 5 Lamp Ceiling Light Diy At B Q

Inlight Grand Matt Plastic Steel Black Led Ceiling Light Diy At B Q

Endor Acrylic Aluminium Metal Chrome Effect 3 Lamp Led Ceiling Light Diy At B Q

Axis Glass Steel Nickel Effect 5 Lamp Ceiling Light Diy At B Q

Homcom Crystal Ceiling Light Modern Chandeliers Stainless Steel Pendant Lights With Decorations Silver Diy At B Q

Colours Leto Brushed Metal Plastic White Led Ceiling Light Diy At B Q

Colours Filum Brushed Chrome Effect Ceiling Light Diy At B Q

Inlight Elevate Glass Steel Chrome Smoked Effect 5 Lamp Ceiling Light Diy At B Q
6 lamp ceiling light homcom round crystal 7 3 steel chrome effect led colours caelus brushed metal modern goodhome caladane 4 bathroom komet pendant 20