Cloud Ceiling Light Installation: Essential Guide
Cloud ceiling lights, with their ethereal beauty and ability to elevate any space, have become a popular choice for homeowners. However, installing these lights can be a daunting task if not approached correctly. This guide will provide you with a comprehensive overview of the essential aspects of cloud ceiling light installation, ensuring a successful and safe outcome.
Planning and Preparation
Before beginning the installation, it's crucial to plan and prepare thoroughly. Determine the desired location for your cloud ceiling light, taking into account the available space, ceiling height, and electrical wiring. Ensure that the electrical wires are properly sized and that you have all the necessary tools, including a ladder, drill, screwdriver, and wire strippers.
Mounting the Bracket
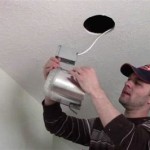
Once you have determined the installation location, the next step is to mount the bracket that will support the cloud ceiling light. Identify the electrical wires and position the bracket accordingly. Secure the bracket to the ceiling using appropriate screws or bolts. Ensure that the bracket is level and firmly attached.
Wiring the Light Fixture
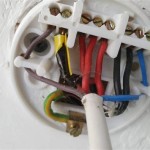
With the bracket securely installed, proceed with wiring the light fixture. Carefully connect the black wire from the fixture to the black wire from the electrical supply, and the white wire from the fixture to the white wire from the supply. Ground the fixture by connecting the green or bare copper wire to the ground wire from the supply. Ensure all wire connections are tight and secure using wire nuts or crimping connectors.
Installing the Cloud Light Fixture
Now, it's time to install the cloud light fixture onto the bracket. Carefully lift the fixture and align it with the bracket. Engage the mounting mechanism, ensuring that the fixture is securely attached. Tighten any screws or bolts to secure the fixture in place.
Connecting the Power Supply
Once the fixture is installed, connect the power supply to the electrical wires. Turn on the power at the circuit breaker or fuse box and test the light to ensure it's functioning properly. Check for any flickering or unusual sounds.
Tips for a Successful Installation
To ensure a successful cloud ceiling light installation, follow these tips:
- Wear appropriate safety gear, including gloves and safety glasses.
- Turn off the power supply at the circuit breaker or fuse box before starting any electrical work.
- Use a level to ensure that the bracket and fixture are mounted levelly.
- Tighten all wire connections securely using wire nuts or crimping connectors.
- Test the light fixture before connecting it to the power supply.
Conclusion
Installing cloud ceiling lights can be a rewarding experience that enhances the beauty and ambiance of your home. By following the steps outlined in this guide, you can ensure a safe and successful installation. If you encounter any difficulties or have any questions, don't hesitate to seek professional assistance from a qualified electrician.

Dewray Fluffy Clouds Pendant Lamp

Rgb Led Lamp Sound Reaction Cloud Singapore

Dewray Fluffy Clouds Pendant Lamp

The Cloud Lamp 6 Steps With Pictures Instructables

Cloud Ceiling At Progress Bar Inhabitat Green Design Innovation Architecture Building

L40 100cm Chandelier Lights Fixtures Cloud Design Home Living Room Ceiling Lamp

Cloud Light Diy What Not To Do Lifestyle News Asiaone

Diy Tiktok Cloud Ceiling Tutorial

Interactive Led Cloud Lamp Richard Clarkson Studio

Cloud Light Panels Tik Tok Ceiling Led My Lights
Related Posts


