Replacing a Light Fitting Ceiling: A Comprehensive Guide
Replacing a light fitting ceiling can be a relatively straightforward task that can significantly enhance the aesthetics and functionality of a room. However, it is important to approach this project with safety precautions while ensuring that the electrical work is done correctly.
In this comprehensive guide, we will cover the essential steps involved in replacing a light fitting ceiling, including safety considerations, tools and materials required, step-by-step installation instructions, and troubleshooting tips.
### Safety ConsiderationsBefore commencing any electrical work, it is crucial to prioritize safety. Always turn off the electricity supply to the circuit you will be working on at the fuse box or circuit breaker panel. Verify that the power is off using a voltage tester.
Wear insulated gloves and safety glasses to protect yourself from potential electrical hazards. It is also advisable to work with a partner, especially when handling heavy light fittings or working at heights.
### Tools and MaterialsGather the necessary tools and materials before starting the project:
- New light fitting
- Screwdriver
- Electrical tape
- Wire cutters
- Voltage tester
- Insulated gloves
- Safety glasses
1. Remove the Existing Light Fitting:
Start by removing the lampshade or diffuser from the existing light fitting. Then, locate the screws holding the light fitting to the ceiling and unscrew them. Carefully disconnect the electrical wires by unscrewing the wire connectors or terminals.
2. Prepare the New Light Fitting:
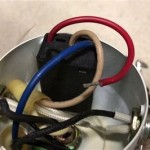
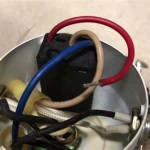
Identify the wires on the new light fitting and match them to the corresponding wires in the ceiling. Strip a small portion of insulation from the ends of each wire.
3. Connect the Electrical Wires:
Twist the ends of the bare wires together by hand and secure them using electrical tape. Ensure the connections are tight and insulated properly.
4. Mount the New Light Fitting:
Connect the wires to the appropriate terminals on the new light fitting and tighten the screws. Then, align the light fitting with the ceiling and secure it by tightening the mounting screws.
5. Install the Lampshade or Diffuser:
Finally, attach the lampshade or diffuser to the light fitting and secure it according to the manufacturer's instructions.
### Troubleshooting Tips1. The Light Fitting Does Not Turn On:
Check if the electricity supply is turned on at the fuse box or circuit breaker panel. Use a voltage tester to verify that the wires are connected correctly.
2. The Light Fitting Is Dim or Flickering:
Loose connections or faulty wiring can cause this issue. Re-check all connections and ensure they are secure. If the problem persists, seek professional assistance.
3. The Light Fitting Is Overheating:
This could be due to faulty wiring or an oversized light bulb. Turn off the power and disconnect the light fitting. Replace the light bulb with one of the correct wattage and consult an electrician if the issue persists.
### ConclusionReplacing a light fitting ceiling can be a rewarding project that can improve the lighting and overall ambiance of a room. By following these steps carefully and adhering to safety precautions, you can safely and effectively complete this task.
If you encounter any difficulties or have any concerns, do not hesitate to seek assistance from a qualified electrician. Their expertise will ensure the safe and proper installation of your new light fitting, allowing you to enjoy its benefits for years to come.

How To Install A Ceiling Light Fixture Diy Family Handyman

How To Install A Ceiling Light Fixture Diy Family Handyman

Changing A Light Fitting

Inside The Circuit Pendant Lighting Light Switch Wiring Homeowner Faqs

How To Install A Ceiling Light Fixture Diy Family Handyman

How To Replace Install A Light Fixture The Art Of Manliness

How To Install A Light Fixture Diy Home Improvement

How To Install Ceiling Light Homeserve Usa

How To Replace Install A Light Fixture The Art Of Manliness

How To Replace A Light Fixture Apartment Therapy
Related Posts


