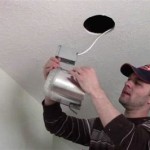
Essential Aspects of Ceiling Light Shade Removal
Ceiling light shades are essential components of home lighting fixtures. They serve both functional and decorative purposes, diffusing light and enhancing the aesthetics of the room. However, when it comes time to replace a lightbulb, clean the shade, or redecorate, removing the shade from the ceiling fixture can be a daunting task.
To ensure a safe and successful shade removal, several essential aspects must be taken into consideration. This article provides a comprehensive guide to the intricacies of ceiling light shade removal, covering the necessary tools, safety precautions, and step-by-step instructions.
Safety Precautions
Before delving into the removal process, it is imperative to prioritize safety. Here are some crucial precautions to observe:
- Turn off the power: Before touching any electrical fixtures, switch off the power at the main breaker or fuse box.
- Use insulated tools: When working with electrical components, always employ insulated tools to prevent electric shocks.
- Wear safety glasses: Protect your eyes from potential glass fragments or debris by wearing safety glasses.
Tools Required
The removal process typically requires a few basic tools:
- Painter's tape
- Step stool or ladder
- Screwdriver (Phillips or flathead, depending on the fixture)
- Soft cloth or sponge
- Cleaning solution (optional)
Instructions
With the necessary precautions and tools gathered, follow these step-by-step instructions for successful ceiling light shade removal:
- Locate the mounting screws: Examine the shade's frame or base for the presence of mounting screws that secure it to the fixture.
- Remove the screws: Using the appropriate screwdriver, carefully unscrew the mounting screws and set them aside in a safe location.
- Gently pull down the shade: Once the screws are removed, gently pull the shade down and away from the fixture. Be cautious not to damage the shade or the fixture.
- Clean the shade (optional): If desired, use a soft cloth or sponge dampened with a cleaning solution to clean the shade. Rinse it thoroughly and allow it to dry before reattaching it.
- Reattach the shade: Align the shade with the fixture and gently push it upwards until it fits snugly into place.
- Secure the screws: Replace the mounting screws and tighten them securely using the screwdriver.
- Turn on the power: Once the shade is reattached, turn on the power at the main breaker or fuse box to restore lighting to the room.
By adhering to these essential aspects and following the instructions carefully, you can effectively remove and reinstall ceiling light shades without any hassle.

How To Remove The Light Cover In Room Frequently Asked Questions Leopalace21 Chintai Als Al Apartments And Monthly Mansion For Single Tenants

How To Remove Ceiling Light Cover With No S All Coast Inspections

The Genius Way To Handle Light Fixtures When Painting Your Ceiling

How To Remove Ceiling Light Cover With No S All Coast Inspections

How To Change A Ceiling Light Making Maanita

How To Remove This Ceiling Light Cover Trying Replace Lightbulbs R Howto

How To Remove Light Cover From Ceiling Tiktok Search

How Do I Replace The Bulb In This Enclosed Bathroom Ceiling Light Hometalk

Difficult To Remove Lens From Fluorescent Fixture Doityourself Com Community Forums

Modern Ceiling Lights Home Repair Tutor
Related Posts


