Essential Aspects of Ceiling Panel Light Fitting
Ceiling panel lights, also known as recessed panel lights, are a common lighting solution for various commercial and residential spaces. They offer a sleek and unobtrusive look, providing ample illumination while blending seamlessly into the ceiling. Installing ceiling panel lights requires careful consideration of several essential aspects to ensure optimal performance and aesthetics.
Choosing the Right Fixture
Selecting the appropriate fixture is crucial for achieving the desired lighting effect. Consider the following factors:
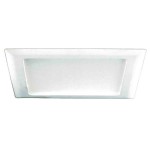
- Size and Shape: Choose a fixture that fits the size of the ceiling panel and the desired coverage area. Circular, square, and rectangular shapes are common options.
- Material: Fixtures are typically made of metal or plastic. Metal fixtures are more durable but may be heavier, while plastic fixtures are lightweight and less expensive.
- Trim: The trim around the fixture can enhance the overall look. Choose a trim that complements the ceiling design and the interior style.
- Light Output and Color Temperature: Determine the brightness and color temperature (warm, neutral, or cool) needed for the space. Higher lumens indicate brighter light, while higher Kelvin temperatures produce cooler light.
Preparing the Ceiling and Wiring
Before installing the fixture, it's essential to prepare the ceiling and wiring:
- Locate the Center: Mark the center of the ceiling panel where the fixture will be installed.
- Cut the Hole: Using a hole saw, cut a hole in the ceiling panel slightly smaller than the fixture's outer dimensions.
- Run the Wiring: Bring the electrical wires to the hole and connect them to the fixture's terminals.
Installing the Fixture
Once the ceiling and wiring are prepared, follow these steps to install the fixture:
- Secure the Junction Box: Mount the junction box to the ceiling joists using screws or a bracket.
- Connect the Fixture: Insert the wires from the fixture into the junction box and connect them to the corresponding terminals.
- Insert the Fixture into the Hole: Carefully insert the fixture into the hole in the ceiling panel.
- Tighten the Screws: Use screws to secure the fixture to the ceiling joists or the junction box.
- Install the Trim: Snap on or screw on the trim around the fixture to conceal the edges.
Maintenance and Troubleshooting
Maintaining ceiling panel lights ensures optimal performance and longevity:
- Regular Cleaning: Wipe down the fixture and trim with a damp cloth to remove dust and debris.
- Bulb Replacement: Most fixtures use LED bulbs that rarely need replacing. However, if a bulb fails, it can be easily replaced by removing the fixture and access panel.
- Loose Wiring: If the fixture flickers or turns off intermittently, it may indicate loose wiring. Check the connections in the junction box and tighten any loose wires.
Conclusion
Installing ceiling panel lights requires careful planning and execution to achieve the desired lighting effect and aesthetics. By choosing the right fixture, preparing the ceiling and wiring properly, installing the fixture securely, and maintaining it adequately, you can ensure optimal performance and enhance the ambiance of your space.

How To Install Led Flat Panel Light Ox Lighting

Flat Panel Lights Ceiling Lighting Good Earth

Cyanlite Surface Mounted Led Panel Light Libra Ud

The Four Best Led Flat Panel Light Fixtures Shine Retrofits Lighting Blog

2x2 High Cri Led Panel Light Edge Lit 40w Grnled

Akt Led Panel Light Recessed 600x600 Ceiling Modular Warm 40w Konga Ping

Advantages Disadvantages Of Led Panel Lights In

China Whole Customized Guzhen Zhongshan Interior Custom Lighting Fixture Rectangular Round Square Frameless Ultra Flat Led Ceiling Light Panel Energy Saving Lamp Made In Com

12inch 24w Square Led Ceiling Light Fixtures Flush Mount Black 4000k Neutral White Lamp Surface Modern Lights Slim Flat Panel China Lighting Fixture

Led Light Panel Commercial Ceiling Fixtures
Related Posts


