Essential Aspects of Adding a New Ceiling Light Fixture
Renovating your home's lighting can significantly enhance its ambiance and functionality. Adding a new ceiling light fixture is a practical and stylish upgrade that requires careful consideration. Understanding the essential aspects of this task ensures a successful and satisfying outcome.
This article will delve into the critical elements of adding a new ceiling light fixture, guiding you through the key considerations and best practices. From selecting the appropriate fixture to ensuring proper installation, we'll cover all the crucial aspects to help you illuminate your space with confidence.
1. Fixture Selection
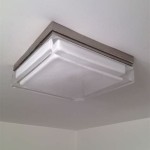
Choosing the right light fixture is paramount. Consider the size, shape, and style of the room, as well as the desired ambiance. Determine the amount of light needed and select a fixture that provides ample illumination. Also, think about the type of light bulb you want to use (e.g., LED, incandescent, CFL) and ensure the fixture accommodates it.
2. Electrical Planning
Before installing the fixture, check the electrical system to ensure it can handle the new load. Determine the amperage and voltage requirements of the fixture and confirm they match the existing wiring. If necessary, consult an electrician to upgrade the wiring or install a new circuit.
3. Location and Height
The placement of the fixture is crucial for optimal lighting. Determine the center point of the room and position the fixture accordingly. Consider the height of the fixture; higher ceilings typically require higher fixtures. Ensure it's not too low to create glare or visual discomfort.
4. Installation Preparation
Gather all necessary tools, including a screwdriver, wire strippers, and electrical tape. Turn off the power at the breaker panel and remove the existing fixture (if applicable). Prepare the wires by stripping the insulation and twisting the wires together.
5. Wiring and Connection
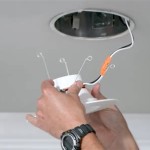
Connect the wires of the fixture to the corresponding wires in the ceiling box. Ensure the colors match (e.g., white to white, black to black, green or bare to ground). Secure the wire connections with wire nuts and tuck them neatly into the ceiling box.
6. Mounting the Fixture
Attach the mounting bracket or canopy to the ceiling box using the provided screws. Then, carefully lift the fixture and secure it to the bracket or canopy. Double-check all connections to ensure they are snug and secure.
7. Finishing Touches
Turn on the power at the breaker panel and test the fixture. If it lights up properly, insert the light bulbs and enjoy your newly illuminated space. Clean up any debris, replace the ceiling plate or cover, and admire the transformed ambiance.

A Comprehensive Guide To The Best Ceiling Lights Designs For Your Home

A Comprehensive Guide To The Best Ceiling Lights Designs For Your Home

A Comprehensive Guide To The Best Ceiling Lights Designs For Your Home

Adding Overhead Lighting Extra S Young House Love

Do Light Fixtures Add Value To Your Home Homeserve Usa

Diy Add A New Light Fixture R Askelectricians

How To Change A Ceiling Light Making Maanita

Clever Ways To Add Light A Room Without Wiring

The Easiest Ways To Spruce Up An Old Light Fixture

Amp Up Your Bedroom Aesthetic With These Ceiling Light Design Ideas Crompton Greaves Consumer Electricals Limited
Related Posts


