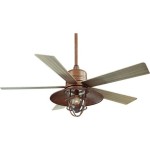
Essential Aspects of Removing a Flush Ceiling Light Fixture
Replacing or repairing a ceiling light fixture is a simple task that can be completed in a few steps. Understanding the essential aspects of removing a flush ceiling light fixture is crucial to ensure safety and prevent damage to the fixture or ceiling. This article will explore these key aspects, providing a comprehensive guide to safely and effectively removing a flush ceiling light fixture.
Before beginning, it is important to note that electrical work should always be handled by a qualified electrician. If you are uncomfortable with any part of the process, do not hesitate to seek professional assistance.
1. Safety Precautions
Safety should always be the top priority when working with electricity. Before starting, make sure to turn off the power to the light fixture at the circuit breaker or fuse box. Verify that the power is off by using a non-contact voltage tester. Wear safety glasses and gloves to protect your eyes and hands from any potential hazards.
2. Identifying the Fixture Type
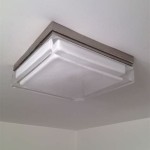
There are two main types of flush ceiling light fixtures: recessed and surface-mounted. Recessed fixtures are installed into the ceiling, while surface-mounted fixtures are attached directly to the surface of the ceiling. Identifying the type of fixture you have will determine the removal process.
3. Removing the Shade
Most ceiling light fixtures have a removable shade or diffuser. To remove the shade, gently pull it straight down or unscrew it counterclockwise. Be careful not to damage the shade or its mounting mechanism.
4. Disconnecting the Fixture
Once the shade is removed, you will see the electrical connections for the fixture. Locate the wire nuts that connect the wires from the fixture to the wires from the ceiling. Using a pair of pliers, carefully unscrew the wire nuts and separate the wires.
5. Removing the Fixture
For recessed fixtures, locate the clips or screws that hold the fixture in place. Use a screwdriver to unscrew the screws or gently pry open the clips. For surface-mounted fixtures, simply unscrew the mounting screws that attach the fixture to the ceiling.
6. Lowering the Fixture
Once the fixture is detached, carefully lower it down from the ceiling. Be mindful of any wires or connections that may still be attached. If necessary, disconnect any remaining wires or plugs.
7. Removing the Junction Box (Optional)
In some cases, the flush ceiling light fixture may be connected to a junction box. To remove the junction box, unscrew the screws that attach it to the ceiling and carefully pull it down. Make sure to disconnect any wires that may be attached to the junction box before removing it.
By understanding these essential aspects, you can safely and effectively remove a flush ceiling light fixture. Remember to always prioritize safety and seek professional assistance if you encounter any difficulties.

Replacing Flush Mount Light With Pendant
How To Remove Flush Mount Ceiling Fixture

Remove These Flush Mount Lights R Howto

How To Change A Ceiling Light Making Maanita

Easy Ways To Replace An Led Recessed Light Bulb 13 Steps

How To Remove Ceiling Light Cover No S

How To Open Twist Off The Cover Of Some Really Stupid Awkward Flush Mounted Ceiling Light Dome Fittings Fixtures Replace Change Bulb My Technical Blog

Changing A Bulb In Flush Mount Fixture Doityourself Com Community Forums

Light Fixture Has Rubber Washer Over Plastic Tube Holding It In Place How To Remove R Fixit

How To Open Twist Off The Cover Of Some Really Stupid Awkward Flush Mounted Ceiling Light Dome Fittings Fixtures Replace Change Bulb My Technical Blog
Related Posts


