Troubleshooting a Ceiling Fan Light Kit That Doesn't Work
Ceiling fan light kits can be a convenient way to add both light and air circulation to a room. However, if the light kit stops working, it can be frustrating. There are several possible causes for a ceiling fan light kit to malfunction, including electrical problems, faulty wiring, or a burned-out bulb. In this article, we will discuss the essential aspects of troubleshooting a ceiling fan light kit that is not working and provide step-by-step instructions on how to fix common issues.
Safety Precautions
Before you begin troubleshooting your ceiling fan light kit, it is important to take the following safety precautions:
- Turn off the power to the ceiling fan at the circuit breaker or fuse box.
- Allow the fan to come to a complete stop before attempting any repairs.
- Use a sturdy ladder or step stool to reach the ceiling fan.
- Wear safety glasses to protect your eyes from flying debris.
Troubleshooting Electrical Problems
If the light kit is not working, the first step is to check for electrical problems. This can be done using a voltage tester or multimeter. To use a voltage tester, touch the probes to the two wires that connect the light kit to the ceiling fan. If the tester lights up, then there is power to the light kit. If the tester does not light up, then there is a problem with the electrical connection.
If there is no power to the light kit, then the next step is to check the wiring. Make sure that the wires are securely connected to the light kit and the ceiling fan. If the wires are loose or damaged, they will need to be repaired or replaced.
If the wiring is intact, then the next step is to check the circuit breaker or fuse. If the circuit breaker has tripped or the fuse has blown, then it will need to be reset or replaced.
Replacing a Burned-Out Bulb
If the light kit is still not working after checking the electrical connections, then the next step is to replace the bulb. To do this, follow these steps:
- Turn off the power to the ceiling fan at the circuit breaker or fuse box.
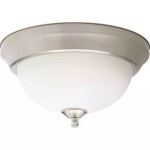
- Remove the glass shade or diffuser from the light kit.
- Unscrew the old bulb and replace it with a new one of the same wattage and type.
- Replace the glass shade or diffuser and turn the power back on.
If the light kit still does not work after replacing the bulb, then you may need to call an electrician for assistance.
Conclusion
Troubleshooting a ceiling fan light kit that is not working can be a relatively simple task. By following the steps outlined in this article, you can identify the problem and fix it quickly and easily. However, if you are not comfortable working with electricity, it is always best to call a qualified electrician for assistance.

Ceiling Fan Troubleshooting The Home Depot

Hampton Bay Light Kit Not Working R Askelectricians

Ceiling Fan Light Troubleshooting The Home Depot

Ceiling Fan Light Troubleshooting The Home Depot

Ceiling Fan Light Troubleshooting The Home Depot

Ceiling Fan Light Troubleshooting The Home Depot

How To Replace A Ceiling Fan Light Kit Smafan Com

Hunter Ceiling Fan Light Won T Turn On But The Still Works How Can This Be Repaired R Askanelectrician

Ceiling Fan Light Kit Installation How To

How To Add A Light Kit Your Ceiling Fan Mr Electric
Related Posts


