How to Install a Ceiling Fan with Wall Switch
Installing a ceiling fan with a wall switch is a relatively straightforward task that can be completed in a few hours. However, it is important to follow the instructions carefully to ensure that the fan is installed safely and correctly. Before you begin, gather all the necessary tools and materials, including:
Tools:
- Phillips head screwdriver
- Flat head screwdriver
- Wire strippers
- Electrical tape
- Drill
- Level
Materials:
- Ceiling fan
- Ceiling fan mounting bracket
- Electrical box
- Wall switch
- Wire nuts
- Screws
Once you have gathered all the necessary tools and materials, you can begin the installation process. The first step is to turn off the power to the circuit that will be powering the fan. This can be done at the circuit breaker panel.
Next, you will need to locate the center of the room where you want to install the fan. You can do this by measuring the length and width of the room and dividing each measurement in half. Mark the center point on the ceiling.
Once you have located the center of the room, you will need to install the electrical box. The electrical box will support the weight of the fan, so it is important to make sure that it is securely attached to the ceiling. Use the screws that came with the electrical box to attach it to the ceiling joists.
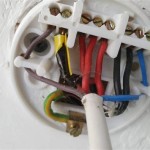
Next, you will need to connect the wires from the electrical box to the wires from the fan. The black wire from the electrical box should be connected to the black wire from the fan. The white wire from the electrical box should be connected to the white wire from the fan. The ground wire from the electrical box should be connected to the ground wire from the fan.
Once the wires are connected, you can mount the fan to the ceiling. The fan should be mounted so that the blades are level. You can use a level to check the alignment of the blades.
Finally, you will need to install the wall switch. The wall switch should be installed in a convenient location, such as near the door or light switch. Connect the wires from the wall switch to the wires from the fan. The black wire from the wall switch should be connected to the black wire from the fan. The white wire from the wall switch should be connected to the white wire from the fan. The ground wire from the wall switch should be connected to the ground wire from the fan.
Once the wall switch is installed, you can turn on the power to the circuit and test the fan. The fan should operate smoothly and quietly.

Wiring A Ceiling Fan And Light With Diagrams Ptr

Wiring A Ceiling Fan And Light With Diagrams Ptr

Wiring A Ceiling Fan And Light With Diagrams Ptr

How To Wire A Ceiling Fan Control Using Dimmer Switch

How To Install A Ceiling Fan Two Wall Switches What Bb Built

How To Wire A Ceiling Fan Control Using Dimmer Switch

Wiring A Ceiling Fan And Light With Diagrams Ptr

Wiring A Ceiling Fan And Light With Diagrams Ptr

How To Wire A Ceiling Fan Control Using Dimmer Switch

Ceiling Fan Switch Wiring Electrical 101
Related Posts


