Wiring a Hunter Ceiling Fan Remote
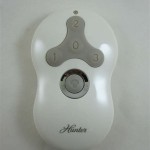
Installing a Hunter ceiling fan remote can be a great way to add convenience and functionality to your home. With a remote, you can control the fan's speed, direction, and light from anywhere in the room. Wiring a Hunter ceiling fan remote is a relatively simple process, but it's important to follow the instructions carefully to ensure a safe and proper installation.
Tools and Materials
Before you begin, you will need to gather the following tools and materials:
- Hunter ceiling fan remote
- Ceiling fan receiver
- Wire nuts
- Electrical tape
- Screwdriver
- Ladder
Instructions
Once you have gathered your tools and materials, you can follow these instructions to wire a Hunter ceiling fan remote:
- Turn off the power to the ceiling fan at the circuit breaker.
- Remove the ceiling fan canopy by unscrewing the screws that hold it in place. Be careful not to drop the canopy.
- Locate the wires that connect the ceiling fan to the electrical box. These wires will typically be black (hot), white (neutral), and green or bare copper (ground).
- Connect the black wire from the ceiling fan receiver to the black wire from the ceiling fan. Connect the white wire from the receiver to the white wire from the fan. Connect the green or bare copper wire from the receiver to the green or bare copper wire from the fan.
- Secure the wire connections with wire nuts. Wrap the wire nuts with electrical tape to insulate them.
- Reinstall the ceiling fan canopy.
- Turn on the power to the ceiling fan at the circuit breaker.
- Test the remote control to make sure it is working properly.
Tips
Here are a few tips to help you wire a Hunter ceiling fan remote:
- Make sure that the wires are securely connected. Loose connections can cause the fan to malfunction or even pose a fire hazard.
- Use wire nuts that are the correct size for the wires you are connecting. Wire nuts that are too small or too large will not provide a secure connection.
- Wrap the wire nuts with electrical tape to insulate them. This will help to prevent electrical shock and fires.
- If you are not comfortable wiring the ceiling fan remote yourself, you can hire an electrician to do it for you.
Conclusion
Wiring a Hunter ceiling fan remote is a relatively simple process, but it's important to follow the instructions carefully to ensure a safe and proper installation. By following these steps, you can add convenience and functionality to your home with a Hunter ceiling fan remote.

Bypass Hunter Fan Receiver Doityourself Com Community Forums

How Do I Install New Hunter Ceiling Fan With Remote Control And Still Have Switch Wall For The Light Separately R Homemaintenance

Ceiling Fan Remote With 2 Wires Doityourself Com Community Forums

How To Install A Hunter Ceiling Fan With Remote Know The Right Way
Tx29 Remote Control For Ceiling Fan User Manual Hunter
Tx30 Remote Control For Ceiling Fan User Manual Owners Hunter

Hunter Ceiling Fan Control Wire Harness Repairs Start Sd Capacitors Reverse Switches 240 V Genuine Parts
3 Way Wiring Ceiling Fan With Remote For Two Wire Diy Home Improvement Forum

Hunter Fan 41228 1 Type 3 Ceiling Fans Instruction Manual

I Bought A New Ceiling Fan With Light That Has Wired Remote Switch There Is Receiver To The House Wiring
Related Posts


