Install a Ceiling Fan to an Existing Wall Switch
Installing a ceiling fan to an existing wall switch is a project that can be completed in a few hours with the right tools and materials. Here is a step-by-step guide to help you get started:
Step 1: Gather Your Materials and Tools
You will need the following materials and tools to install a ceiling fan to an existing wall switch:
- Ceiling fan
- Wall switch
- Electrical wire
- Wire nuts
- Screwdriver
- Drill
- Level
- Safety glasses
Step 2: Turn Off the Power
Before you begin any electrical work, it is important to turn off the power to the circuit that you will be working on. You can do this by flipping the circuit breaker or removing the fuse that powers the circuit.
Step 3: Remove the Old Light Fixture
Once the power is off, you can remove the old light fixture. To do this, simply unscrew the screws that hold the fixture in place and carefully pull it down.
Step 4: Install the Ceiling Fan Mount
The next step is to install the ceiling fan mount. The mount will come with screws that will need to be driven into the ceiling joists. Use a level to make sure that the mount is level before you tighten the screws.
Step 5: Wire the Ceiling Fan
Now it's time to wire the ceiling fan. The fan will come with a wiring diagram that will show you how to connect the wires. Be sure to follow the diagram carefully and use wire nuts to secure the connections.
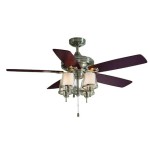
Step 6: Install the Ceiling Fan
Once the fan is wired, you can install it on the ceiling mount. To do this, simply lift the fan up into place and secure it with the screws that came with the fan.
Step 7: Install the Wall Switch
The final step is to install the wall switch. The switch will come with screws that will need to be driven into the electrical box. Once the switch is installed, you can turn the power back on and test the fan.
Tips for Installing a Ceiling Fan
Here are a few tips to help you install a ceiling fan safely and easily:
- Make sure that the ceiling fan is the right size for your room.
- Install the fan at least 7 feet above the floor.
- Use a level to make sure that the fan is level.
- Follow the manufacturer's instructions carefully.
- If you are not comfortable working with electricity, it is best to hire a qualified electrician.
Installing a ceiling fan to an existing wall switch is a relatively easy project that can be completed in a few hours. By following these steps, you can save money and enjoy the benefits of a ceiling fan in your home.

Wiring A Ceiling Fan And Light With Diagrams Ptr
How To Wire A Ceiling Fan Light Switch Quora

Replacing A Ceiling Fan Light With Regular Fixture Jlc

Wiring A Ceiling Fan And Light With Diagrams Ptr

Wiring A Ceiling Fan And Light With Diagrams Ptr
Replacing A Ceiling Fan Light With Regular Fixture Jlc
Wiring New Ceiling Fan To Existing Light Switch Diy Home Improvement Forum

Wiring A Ceiling Fan And Light With Diagrams Ptr

Rewire A Switch That Controls An To Control Overhead Light Or Fan

Ceiling Fan Wiring Diagram Power Into Light
Related Posts


