How To Remove Ceiling Lights For Painting: A Comprehensive Guide
Whether you're a seasoned painter or a novice homeowner, removing ceiling lights is an essential step in any painting project. It ensures that your lights and ceiling receive an even and professional-looking finish. While the process may seem daunting, it's surprisingly straightforward with the right knowledge and tools. Here's a comprehensive guide to help you remove ceiling lights safely and efficiently.
Safety First
Before you begin, ensure your safety by following these precautions:
- Turn off the power to the light fixture at the circuit breaker or fuse box.
- Wear safety glasses to protect your eyes from falling debris.
- Use a step ladder or stable platform to reach the light fixture.
Gather Your Tools
To remove ceiling lights, you'll need the following tools:
- Phillips-head or flat-head screwdriver
- Electrical tape
- Wire strippers (optional)
Step 1: Disconnect the Power
Turn off the power to the light fixture at the circuit breaker or fuse box. If you're unsure which breaker or fuse controls the light, switch off the main power to the house. This step is crucial to prevent electrical shock.
Step 2: Remove the Light Fixture Cover
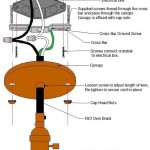
Locate the screws that secure the light fixture cover. Using the appropriate screwdriver, carefully remove these screws. If the cover is attached by clips or latches, gently release them.
Step 3: Disconnect the Wires
Once the cover is removed, you'll see the electrical wires connected to the light fixture. Note the color of each wire and where it's connected. If you're unfamiliar with electrical wiring, take a picture for reference.
Using wire strippers or a screwdriver, carefully loosen the screws holding the wires in place. If there are any wire nuts connecting the wires, unscrew them and separate the wires.
Step 4: Remove the Mounting Bracket
Locate the screws that secure the mounting bracket to the ceiling. Using the screwdriver, carefully remove these screws and gently pull down on the mounting bracket to detach it from the ceiling.
Step 5: Cover the Wires
Wrap electrical tape around the exposed wire ends to prevent any electrical accidents or shorts. Ensure the tape is secure and covers the wire completely.
Step 6: Reinstall the Mounting Bracket (Optional)
If you're replacing or repainting the ceiling, you may wish to remove the mounting bracket completely. However, if you plan to reinstall the same light fixture, it's unnecessary.
Step 7: Reassemble the Light Fixture
Once the ceiling has been painted and dried, it's time to reassemble the light fixture. Follow the steps in reverse order:
- Reattach the mounting bracket to the ceiling.
- Connect the wires to the fixture, ensuring the colors match.
- Secure the wire nuts or screws.
- Place the light fixture cover back in place and secure it with the screws.
Turn the power back on at the circuit breaker or fuse box, and your ceiling light should be working again.
Additional Tips
- If you encounter any loose or damaged wires, consult a qualified electrician.
- Handle the light fixture with care to avoid breaking it.
- If you're painting the ceiling around the light fixture, use masking tape to protect the fixture from paint.
- Allow ample time for the paint to dry before reattaching the light fixture.

The Genius Way To Handle Light Fixtures When Painting Your Ceiling

How To Paint Light Fixtures Update Without Taking Them Down Artsy Rule

How To Protect Light Fixtures When Painting A Ceiling Today S Homeowner

How To Remove Paint From Light Fixtures 13 Steps With Pictures

How To Paint Light Fixtures Update Without Taking Them Down Artsy Rule

How To Replace An Old Fluorescent Light Fixture Young House Love

How To Paint Recessed Lighting In My Own Style

Easiest Way To Spray Paint Recessed Light Trim In 5 Mins

How To Paint A Metal Light Fixture H2obungalow

Easy Ways To Replace An Led Recessed Light Bulb 13 Steps
Related Posts


