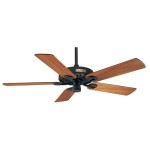
Replace Light to Ceiling Fan: A Comprehensive Guide
Ceiling fans are indispensable home appliances that provide comfort, improve air circulation, and add a touch of style to your living space. However, if your current ceiling light fixture lacks a fan or needs an upgrade, replacing it with a ceiling fan can transform the ambiance of your room and enhance its functionality. Here's a comprehensive guide to help you replace your light with a ceiling fan with ease and precision.
1. Safety Precautions
Before embarking on any electrical work, safety should be your top priority. Always ensure that the power supply to the ceiling light is turned off at the circuit breaker or fuse box. Use a voltage tester to confirm that there's no electricity flowing through the wires. Wear gloves and safety glasses for added protection.
2. Removing the Existing Light Fixture
Start by removing the glass shade or diffuser from the light fixture. Carefully unscrew the bulbs and set them aside. Locate the canopy or mounting plate covering the electrical wires and remove its screws. Gently pull the old light fixture straight down to disconnect it from the ceiling box. Disconnect the wires by twisting them counterclockwise and pulling them apart.
3. Installing the Ceiling Fan Mounting Bracket
The ceiling fan comes with a mounting bracket. Secure this bracket to the junction box in the ceiling using the provided screws. Ensure it is level and tightly fastened. Some ceiling fans may require additional support brackets, especially for sloped ceilings.
4. Connecting the Electrical Wires
Connect the wires from the fan to the wires from the ceiling. Use wire connectors to secure the connections and ensure a proper and safe electrical flow. The wires should be color-coded for easy identification: black to black, white to white, and green or bare copper to ground.
5. Hanging the Ceiling Fan
Lift the ceiling fan and align it with the mounting bracket. Carefully hook the fan onto the bracket and rotate it until it securely snaps into place. Tighten any screws on the canopy to ensure a firm and stable installation.
6. Attaching the Blades
Insert the fan blades into the designated slots on the fan body. Secure them with the provided screws. Ensure the blades are balanced and free of any wobble. Unbalanced blades can cause excessive vibrations during operation.
7. Installing the Light Fixture
If your ceiling fan comes with a light fixture, attach it to the fan body. Connect the wires and install the glass shade or diffuser. Screw in the light bulbs and turn on the power supply.
Conclusion
Replacing a light fixture with a ceiling fan is a straightforward task that can greatly enhance the comfort and functionality of your room. By following these step-by-step instructions, you can confidently complete the job with precision and safety. Enjoy the benefits of improved air circulation, lighting, and style that a new ceiling fan brings to your living space.

4 Ways To Replace A Light Bulb In Ceiling Fan Wikihow

4 Ways To Replace A Light Bulb In Ceiling Fan Wikihow

How To Replace A Ceiling Fan Light Kit Smafan Com

4 Ways To Replace A Light Bulb In Ceiling Fan Wikihow

4 Ways To Replace A Light Bulb In Ceiling Fan Wikihow

How To Replace A Light Fixture With Ceiling Fan Projects By Peter

4 Ways To Replace A Light Bulb In Ceiling Fan Wikihow
Ceiling Fan Light Fixture Replacement Ifixit Repair Guide

Replace Light Fitting Service In Singapore 2024 Affordable Electrician

Replacing The Light On A Ceiling Fan Universal Fans


