Install Ceiling Fixture: A Comprehensive Guide
Installing a ceiling fixture is a common home improvement task that can add both style and function to your living space. While it may seem intimidating, it's actually a relatively simple project that can be completed in a few hours with the right tools and materials.
In this guide, we'll walk you through the essential aspects of installing a ceiling fixture, from choosing the right fixture to wiring and mounting it securely. By following these steps carefully, you can ensure a safe and successful installation.
Choosing the Right Fixture
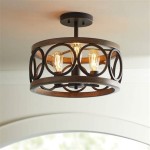
The first step in installing a ceiling fixture is to choose the right fixture for your space. Consider the size, style, and color of the fixture, as well as the type of light it provides. You'll also need to decide whether you want a flush mount fixture, which sits flush against the ceiling, or a semi-flush mount fixture, which hangs down slightly.
Once you've chosen a fixture, make sure you have all the necessary materials. This includes:
- Screwdriver
- Wire strippers
- Electrical tape
- Ceiling fixture box
- Mounting screws
Wiring the Fixture
Once you have all the necessary materials, you can begin wiring the fixture. If you're replacing an existing fixture, start by disconnecting the power to the fixture from the circuit breaker or fuse box.
Next, remove the old fixture and ceiling fixture box. If the old ceiling fixture box is not properly secured, you may need to replace it with a new one.
Once the ceiling fixture box is secure, you can begin wiring the fixture. Most ceiling fixtures have two wires: a black wire and a white wire. Connect the black wire to the black wire from the ceiling fixture box and the white wire to the white wire from the ceiling fixture box. Use wire strippers to strip the insulation off the ends of the wires before connecting them.
Once the wires are connected, wrap them with electrical tape to prevent them from touching each other. Then, tuck the wires into the ceiling fixture box and secure the fixture to the ceiling fixture box with the mounting screws.
Installing the Fixture
Once the fixture is wired, you can install it on the ceiling. If your fixture has a separate mounting bracket, attach the mounting bracket to the ceiling first. Then, hang the fixture on the mounting bracket and secure it with the screws provided with the fixture.
Once the fixture is installed, turn on the power at the circuit breaker or fuse box and test the fixture to make sure it's working properly.
Tips for Installing a Ceiling Fixture
Here are a few tips for installing a ceiling fixture:
- Make sure you turn off the power to the fixture before you begin working on it.
- If you're not comfortable working with electricity, it's best to hire a qualified electrician to install the fixture for you.
- Be careful not to overtighten the mounting screws, as this could damage the fixture or the ceiling.
- If you're installing a fixture in a bathroom or other wet location, make sure it's rated for use in wet locations.
Conclusion
Installing a ceiling fixture is a relatively simple project that can be completed in a few hours with the right tools and materials. By following these steps carefully, you can ensure a safe and successful installation.
If you have any questions or concerns, don't hesitate to consult a qualified electrician for assistance.

Mounting Light Fixtures Fine Homebuilding

How To Install Ceiling Light Homeserve Usa

How To Install A New Light Fixture Apartment Therapy

How To Replace Install A Light Fixture The Art Of Manliness

How To Install A Lighting Fixture Forbes Home

How To Install A Vintage Ceiling Light Fixture Simple Decorating Tips

How To Install A Ceiling Light Fixture Diy Family Handyman

How To Replace Install A Light Fixture The Art Of Manliness

Replacing A Ceiling Fan Light With Regular Fixture Jlc

How To Install A Ceiling Light Fixture Diy Family Handyman
Related Posts

