Install Flush Ceiling Lights Like a Pro: A Comprehensive Guide
Flush ceiling lights are a popular choice for illuminating homes, offices, and commercial spaces. They offer a clean, modern look and can provide ample light without taking up much space. Installing flush ceiling lights is generally a straightforward process, but it's important to follow the steps carefully to ensure a safe and functional installation.
Gather Your Tools and Materials
Before you begin, make sure you have all the necessary tools and materials. You will need the following:
- New flush ceiling light
- Screwdriver
- Wire strippers
- Electrical tape
- Drill and drill bit (optional)
- Stud finder (optional)
Prepare the Electrical Box
Once you have gathered your tools and materials, start by preparing the electrical box. This is the metal box that will house the light fixture. If the box is not already in place, you will need to install it. To do this, use a stud finder to locate a stud in the ceiling. Then, drill a hole in the ceiling and insert the box. Use screws to secure the box to the stud.
Disconnect the Power
Before you begin working on the electrical wiring, it is very important to disconnect the power to the circuit at the breaker box. This will ensure that you do not receive an electrical shock.
Remove the Old Light Fixture (If Necessary)
If there is an existing light fixture in place, you will need to remove it. To do this, first remove the glass shade or diffuser. Then, unscrew the screws that hold the light fixture in place. Carefully pull the fixture down from the ceiling, being careful not to damage the wires.
Connect the Wires
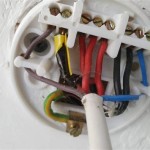
Once the old light fixture is removed, you will need to connect the wires from the new fixture to the wires in the electrical box. Make sure to match the colors of the wires. Connect the white wire from the fixture to the white wire in the box, the black wire from the fixture to the black wire in the box, and the green or copper wire from the fixture to the ground wire in the box. Twist the wires together and secure them with electrical tape.
Mount the Fixture
Now it's time to mount the fixture to the ceiling. If the fixture has screws, align it with the holes in the electrical box and insert the screws. Tighten the screws until the fixture is secure. If the fixture has a twist-lock mounting system, simply twist the fixture into place.
Install the Glass Shade or Diffuser
Once the fixture is mounted, install the glass shade or diffuser. Make sure the shade is secure and that the bulb is facing down.
Turn on the Power and Test the Light
Finally, turn on the power at the breaker box and test the light. Make sure it is working correctly and that there are no loose wires or other problems.
Tips for Installing Flush Ceiling Lights
- If you are not comfortable working with electricity, it is best to hire a qualified electrician to install the light for you.
- Make sure the light fixture is compatible with the electrical box in your ceiling.
- Use the correct size and type of wire connectors for the wires you are connecting.
- Be careful not to overtighten the screws when mounting the fixture.
- If you are replacing an old light fixture, make sure to dispose of it properly.
With a little preparation and care, you can easily install a flush ceiling light in your home or office. By following the steps in this guide, you can ensure a safe and successful installation.

Light Fixture Flush Mount Installation Wattco Electric

How To Install Flush Mount Ceiling Lights

The Ultimate Flush Ceiling Light Installation And Guide 21 22 Fancy Place

Jim Lawrence Flush Lights Fitting Guide

How To Install Modern Ceiling Light Cover Conversion Kits

How To Install A Semi Flush Mount Ceiling Light

How To Install Outdoor Flush Mount Lights

16w Led Flush Mount Ceiling Light Dimmable 10 5 Inch Brushed Nickel White Lepro

How To Install Flush And Semi Mount Lighting The Home Depot

How To Install Flush And Semi Mount Lighting The Home Depot
Related Posts


