Essential Aspects of Removing Ceiling Spotlight Fittings
Removing ceiling spotlight fittings can be a common task when renovating or repairing your home. It involves carefully understanding the electrical components and adopting safe practices to avoid any accidents or damage to the ceiling. Whether it's for replacing old fixtures, installing new ones, or troubleshooting electrical issues, knowing the essential aspects is crucial to effectively remove ceiling spotlight fittings.
Understanding the Electrical Components
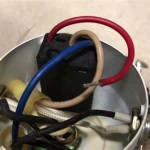
Ceiling spotlight fittings consist of electrical components that need to be handled with caution. The bulb holder, which accommodates the light bulb, is connected to electrical wires that supply power. These wires are typically secured within a junction box or canopy that houses the electrical connections. Identifying these components is essential before attempting to remove the fitting.
Safety Precautions
Electrical tasks always require safety precautions to prevent any risks. Before starting, switch off the power supply from the circuit breaker or fuse box to avoid electric shocks. Additionally, wear appropriate protective gear such as gloves and safety glasses to shield yourself from potential hazards.
Tools Required
The right tools are essential for efficient removal. Commonly, you will need a screwdriver (Phillips or flathead, depending on the fitting type), an electrical tester, and possibly a ladder for high ceilings. An electrical tester helps verify that the power supply is indeed turned off before handling the fitting.
Step-by-Step Removal Process
Once the safety measures are in place and the tools are gathered, follow these steps to remove the ceiling spotlight fitting:
- Switch Off Power and Test: Turn off the power from the electrical panel and use an electrical tester to confirm no current is flowing.
- Remove the Bulb: Unscrew and remove the light bulb from the fitting.
- Disconnect the Wires: Inside the junction box or canopy, locate the wires and disconnect them from the bulb holder. Use appropriate wire connectors for safety.
- Unscrew the Fitting: Identify the screws or clips holding the fitting in place and carefully unscrew or detach them.
- Lower the Fitting: Gently lower the fitting from the ceiling. Be mindful of any wires or cables that may still be attached.
Once the fitting is removed, you can proceed with replacing it or performing any necessary repairs or troubleshooting.
Troubleshooting Common Issues
During the removal process, you may encounter issues such as stuck screws or loose wires. If a screw is stuck, apply penetrating oil and try again. For loose wires, carefully tighten the connections using wire connectors.
Conclusion
Removing ceiling spotlight fittings requires careful attention to electrical components, safety precautions, and the use of appropriate tools. By understanding these essential aspects and following the recommended steps, you can safely and effectively remove ceiling spotlight fittings when needed. Whether it's for renovation, repairs, or troubleshooting, this knowledge will empower you to handle this task with confidence.

How To Change Downlights Or Recessed Lights In False Ceiling Electrician Singapore Recommended Services

How Do I Remove This Light Fitting From Ceiling R Diy

Easy Ways To Replace An Led Recessed Light Bulb 13 Steps

Anyone Knows How To Remove This Ceiling Light Bulb R Diy
How To Remove A Stuck Ceiling Light Cover Diynot Forums

Downlight Stuck And Cannot Replace Bulb Diynot Forums

How Do I Change This Spot Light Bulb R Diy

Change A Spotlight Onehousing

Changing A Bulb In Sealed Bathroom Downlight Diynot Forums

How To Change A Led Downlight Easily Do It Yourself E Green Electrical
Related Posts

