How to Install a Ceiling Fan Receiver
Installing a ceiling fan receiver is a relatively simple task that can be completed in a few hours. By following these step-by-step instructions, you can ensure that your ceiling fan is installed correctly and safely.
Materials You'll Need
- Ceiling fan receiver
- Screwdriver
- Wire strippers
- Electrical tape
- Wire nuts
Step-by-Step Instructions
- Turn off the power to the ceiling fan circuit at the breaker box. This is a critical safety precaution that should never be skipped.
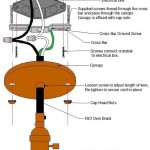
- Remove the old ceiling fan receiver (if applicable). To do this, simply unscrew the wires from the receiver and pull it out of the ceiling fan canopy.
- Connect the wires from the ceiling fan to the receiver. The black wire from the fan should be connected to the black wire on the receiver, the white wire from the fan should be connected to the white wire on the receiver, and the green or bare wire from the fan should be connected to the green or bare wire on the receiver.
- Secure the wires with wire nuts. Twist the ends of the wires together and then screw on a wire nut to secure them. Make sure that the wire nuts are tight enough to prevent the wires from coming loose.
- Wrap the wires with electrical tape. This will help to insulate the wires and prevent them from shorting out.
- Push the wires back into the ceiling fan canopy. Make sure that the wires are not pinched or crimped.
- Screw the receiver into the ceiling fan canopy. Tighten the screws until the receiver is securely in place.
- Turn on the power to the ceiling fan circuit at the breaker box.
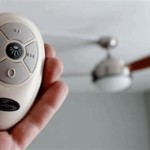
- Test the ceiling fan to make sure that it is working properly. The fan should turn on when you press the button on the remote control.
Tips
- If you are not comfortable working with electricity, it is best to hire a qualified electrician to install the ceiling fan receiver for you.
- Make sure that the receiver is compatible with your ceiling fan. Not all receivers are compatible with all ceiling fans.
- Be sure to follow the manufacturer's instructions carefully when installing the receiver.
- If you have any questions about installing the receiver, consult a qualified electrician.
Conclusion
Installing a ceiling fan receiver is a relatively simple task that can be completed in a few hours. By following these step-by-step instructions, you can ensure that your ceiling fan is installed correctly and safely. Enjoy the convenience of controlling your ceiling fan with a remote control!
I Am Installing A Remote To Ceiling Fan Where Does The Red Wire Go Quora

How To Wire A Ceiling Fan Control Using Dimmer Switch

Wiring For A Ceiling Fan With Dimmer Switch And Remote Doityourself Com Community Forums

How To Install A Ceiling Fan Two Wall Switches What Bb Built

How To Connect Wiring For Ceiling Fan With Remote Receiver Connection Two Switches Manual Only Shows Method Single Switch R Askanelectrician

Ceiling Fan Remote With 2 Wires Doityourself Com Community Forums

How Do I Install New Hunter Ceiling Fan With Remote Control And Still Have Switch Wall For The Light Separately R Homemaintenance
Universal Ceiling Fan Remote Replacement Ifixit Repair Guide

Bypass Hunter Fan Receiver Doityourself Com Community Forums

Universal Ceiling Fan And Light Remote Control Kit Add A No In Wall Wiring Required Switch Sd Timming On Off Scene With Receiver Plate
Related Posts


