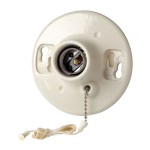
How to Replace Light Switch on Harbor Breeze Ceiling Fan
Harbor Breeze ceiling fans are a popular choice for homeowners looking to add style and comfort to their living spaces. These fans are known for their durability and reliability, but like any appliance, they may require occasional repairs or replacements. One common issue that homeowners may encounter is a faulty light switch. If you find that the light switch on your Harbor Breeze ceiling fan is not working properly, you can easily replace it with a few simple steps.
Step 1: Gather the Necessary Tools
Before you begin the replacement process, ensure you have the following tools and materials:
- New light switch compatible with your Harbor Breeze ceiling fan model
- Screwdriver
- Wire stripper
- Electrical tape
- Ladder (if necessary)
Step 2: Turn Off the Power
To ensure your safety, turn off the power to the ceiling fan at the circuit breaker or fuse box. This will prevent any electrical shocks or accidents while working on the light switch.
Step 3: Remove the Light Switch Cover
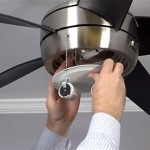
Locate the light switch cover on the ceiling fan housing. It is typically held in place with screws or clips. Carefully remove the cover to expose the light switch.
Step 4: Disconnect the Wires
Inside the light switch, you will see wires connected to the switch terminals. These wires are typically color-coded for easy identification. Use the wire stripper to carefully strip the insulation off the ends of the wires, exposing about half an inch of bare wire.
Once the wires are exposed, loosen the screws or terminals holding them in place. Be careful not to drop any screws or small parts into the fan housing.
Step 5: Remove the Old Light Switch
Once the wires are disconnected, you can remove the old light switch from the fan housing. Simply unscrew or unclip the switch and carefully pull it out.
Step 6: Install the New Light Switch
Take the new light switch and connect the wires to the appropriate terminals. Match the wire colors to the terminals, ensuring the "hot" wire is connected to the "hot" terminal, the "neutral" wire to the "neutral" terminal, and the "ground" wire to the "ground" terminal.
Tighten the screws or terminals to secure the wires in place. Make sure the connections are snug and secure, but avoid overtightening.
Step 7: Reattach the Light Switch Cover
Once the light switch is installed, reattach the cover. Make sure it is securely in place to prevent any exposed wires.
Step 8: Turn on the Power and Test the Light Switch
Turn on the power at the circuit breaker or fuse box. Then, use the light switch to turn on the fan light. Check to ensure that the light switch is working properly and that the light turns on and off as intended.
If the light switch is not working correctly, double-check the wire connections to ensure they are secure and correctly matched to the terminals. You may also need to troubleshoot the electrical circuit if the problem persists.
Replacing a light switch on a Harbor Breeze ceiling fan is a relatively simple task that can be completed in a few minutes. By following these steps carefully, you can restore the functionality of your ceiling fan and enjoy the convenience of a working light switch.

Harbor Breeze 2 Setting Chrome Ceiling Fan Switch In The Accessories Department At Com
How To Wire A Harbor Breeze Fan And Light 2 Switches Quora

Harbor Breeze 3 Setting Chrome Ceiling Fan Switch In The Accessories Department At Com

3 Sd Ceiling Fan Pull Chain Switch Wiring Pickhvac

Ceiling Fan Light Repair Home Tutor

4 Ways To Replace A Light Bulb In Ceiling Fan Wikihow

Harbor Breeze Ceiling Fan Wiring Questions Doityourself Com Community Forums

How To Install A Ceiling Fan Remote Extreme Diy

Harbor Breeze 1 In 2 Setting Brass Metal Indoor Universal Ceiling Fan Switch The Accessories Department At Com

Converting Remote Operated Fan To 2 Wall Switches Doityourself Com Community Forums
Related Posts


