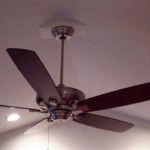
Essential Aspects of Replacing a Ceiling Electrical Box
Replacing a ceiling electrical box might seem like a daunting task, but it can be done safely and efficiently with the right tools, materials, and knowledge. Whether you're a DIY enthusiast or a seasoned electrician, understanding the essential aspects of this process is crucial for a successful and safe outcome. This guide will walk you through the key steps involved in replacing a ceiling electrical box.
1. Gather the Necessary Tools and Materials
Before you begin, make sure you have the appropriate tools and materials on hand. This typically includes:
- Safety glasses
- Work gloves
- Electrical tester
- Phillips head screwdriver
- Flathead screwdriver
- Wire stripper
- Replacement ceiling electrical box
- Electrical tape
- Ceiling fan brace (if replacing a box for a ceiling fan)
- Drywall saw or utility knife
2. Turn Off the Power
Safety is paramount when working with electricity. Before you touch any wires or fixtures, turn off the power to the circuit that controls the ceiling electrical box you're replacing. You can do this by flipping the appropriate circuit breaker or removing the fuse from the fuse box.
3. Verify the Power Is Off
Use an electrical tester to confirm that the power is indeed turned off. Touch the tester's probes to the wires in the electrical box to ensure there is no current flowing through them.
4. Remove the Old Electrical Box
Once you're certain the power is off, proceed to remove the old electrical box. To do this, use a screwdriver to remove the screws securing the box to the ceiling joists.
If the box is mounted on drywall, you may need to use a drywall saw or utility knife to carefully cut around the box, making sure not to damage the wires inside.
5. Prepare the New Electrical Box
Before installing the new electrical box, you need to make sure it's properly sized for the application. Measure the dimensions of the old box to determine the appropriate replacement size.
If you're replacing a box for a ceiling fan, you'll also need to install a ceiling fan brace. This provides additional support for the weight of the fan and prevents the box from being pulled out of the ceiling.
6. Connect the Wires
Once the new box is in place, it's time to connect the wires. Use a wire stripper to remove about 1/2 inch of insulation from the ends of the wires.
Twist the exposed ends of the wires together and secure them with electrical tape. Make sure the connections are tight and secure.
7. Secure the New Electrical Box
With the wires connected, you can now secure the new electrical box to the ceiling joists. Use the same screws that you removed from the old box.
If you're installing a ceiling fan, make sure the box is securely attached to the ceiling fan brace.
8. Test the Circuit
Once the new electrical box is installed and the wires are connected, turn the power back on and use an electrical tester to verify that the circuit is working properly.
If everything is functioning correctly, you can proceed to reattach the light fixture or ceiling fan to the new electrical box.
Conclusion
Replacing a ceiling electrical box requires careful attention to detail and safety precautions. By following these steps and ensuring the power is turned off before starting any work, you can successfully replace the box and restore proper electrical function to your ceiling fixtures.
:strip_icc()/SCW_128_02-cefb4c77582c4dbaaba07e619aeacf8f.jpg?strip=all)
How To Install A Ceiling Fan Electrical Box

How Do I Remove This Ceiling Electrical Box R Home

Ceiling Fan Wobbly Electrical Box Is Loose Doityourself Com Community Forums

How To Retrofit A Ceiling Fan Electrical Box Fine Homebuilding

How To Remove Replace This Ceiling Junction Box R Askanelectrician

How To Replace A Light Fixture With Ceiling Fan Projects By Peter

Replace Old Ceiling Pancake Box
:strip_icc()/SCW_128_11-7e1617dc2e414228b5d03568d1c7c022.jpg?strip=all)
How To Install A Ceiling Fan Electrical Box

How To Install A Ceiling Fan Diy Family Handyman

How To Remove Replace This Ceiling Junction Box R Askanelectrician


