Martec mplcds ceiling fan remote controller installation guide slimline ac control mprems from fourseasons infrared kit lost the accessories replacements four seasons lighting premier pca electrical supplies link fsl1244w fans lifestyle controlled dc 130cm temple webster white wave 1320mm with led light mwf1333wsr s

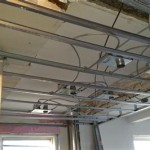
Martec Mplcds Ceiling Fan Remote Controller Installation Guide

Slimline Ac Ceiling Fan Remote Control Mprems From Martec

Ceiling Fan Remote Controller

Martec Fourseasons Ceiling Fan Infrared Remote Control Kit Installation Guide

Lost The Remote Martec Control Accessories Replacements

Four Seasons Martec Infrared Ceiling Fan Remote Control Kit The Lighting

Martec Premier Slimline Ac Ceiling Fan Remote Control Mprems Pca Electrical Supplies

Link Fsl1244w Martec Ceiling Fans

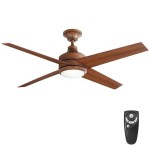
Martec Lifestyle Remote Controlled Dc Ceiling Fan 130cm Temple Webster

Martec Four Seasons Infrared Ceiling Fan Remote Control Kit Temple Webster

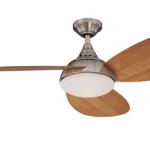
Martec White Wave 1320mm Dc Ceiling Fan With Remote Control Led Light Mwf1333wsr Electrical S

Martec Mpwifi Ins Pulse Smart Wi Fi Remote Controller For Ac Ceiling Fans Installation Guide

Rfr5056 Ventair Remote Control Function For 50 56 Da Fans

Albatross 84 Dc Ceiling Fan With Remote Martec Fans

Link 1220mm 48 Ac Ceiling Fan Martec

Martec Mrf134w Series Razor Ac Ceiling Fan User Manual

Martec Lifestyle 1320mm 52 Ac Ceiling Fan White Dls134w Pca Electrical Supplies

Martec Link 48 Ac Ceiling Fan With E27 Light Remote Control Middy S Electrical

Martec Newport Dc Ceiling Fan With Cct Led Light Black 56 Fans

Martec Wave 60in 152cm Dc Ceiling Fan With 18w Led Cct Light Matt Blac The Blue Space
Martec mplcds ceiling fan remote slimline ac control controller fourseasons infrared four seasons premier link fsl1244w fans dc 130cm kit white wave 1320mm
Related Posts