How To Wire Ceiling Fan Existing Light Switch With Dimmer
Installing a ceiling fan with a light and dimmer switch is a great way to improve the comfort and style of your home. However, it can be a daunting task if you're not familiar with electrical wiring. In this article, we'll walk you through the steps on how to wire a ceiling fan to an existing light switch with a dimmer. We'll also provide some tips on troubleshooting common problems.
Before you begin, it's important to make sure that you have all of the necessary tools and materials. You'll need a screwdriver, a wire cutter, a wire stripper, electrical tape, and a voltage tester. You'll also need to purchase a ceiling fan and a dimmer switch that is compatible with your fan.
Step 1: Turn off the power at the breaker panel.
This is a very important safety precaution. Make sure that the power is completely off before you begin working on the wiring.
Step 2: Remove the existing light fixture.
Once the power is off, you can remove the existing light fixture. To do this, simply unscrew the mounting screws and carefully pull the fixture down from the ceiling.
Step 3: Connect the wires.
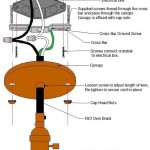
Once the light fixture is removed, you'll need to connect the wires from the fan to the wires from the dimmer switch. The black wire from the fan should be connected to the black wire from the dimmer switch. The white wire from the fan should be connected to the white wire from the dimmer switch. The green or bare copper wire from the fan should be connected to the green or bare copper wire from the dimmer switch.
Step 4: Mount the ceiling fan.
Once the wires are connected, you can mount the ceiling fan to the ceiling. To do this, simply insert the mounting screws into the holes in the fan's mounting bracket and tighten them until the fan is securely in place.
Step 5: Install the light kit.
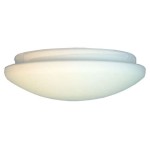
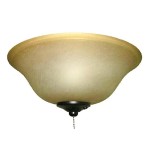
If your ceiling fan came with a light kit, you'll need to install it now. To do this, simply screw the light bulbs into the sockets and then attach the light kit to the fan's motor housing.
Step 6: Turn on the power and test the fan.
Once the light kit is installed, you can turn on the power and test the fan. To do this, simply flip the switch on the dimmer switch.

How To Wire A Ceiling Fan Control Using Dimmer Switch

How To Wire A Ceiling Fan Control Using Dimmer Switch

How To Wire A Ceiling Fan Control Using Dimmer Switch

How To Wire A Ceiling Fan Control Using Dimmer Switch

How To Wire A Ceiling Fan Control Using Dimmer Switch

How To Wire A Ceiling Fan Control Using Dimmer Switch

Ceiling Fan Wiring Diagram With Light Dimmer

I Recently Installed A Ceiling Fan With Light Where There Was Formerly Just It Works Great But The Switch On Wall Doesn T Turn Off Why

Replacing A Ceiling Fan Light With Regular Fixture Jlc

How To Wire A Ceiling Fan Control Using Dimmer Switch
Related Posts