How To Wire A Hampton Bay Ceiling Fan
When it comes to home improvement projects, electrical work can be daunting. However, with the right instructions and safety precautions, you can successfully wire a Hampton Bay ceiling fan and enhance the comfort and style of your home. This article will guide you through the essential aspects of wiring a Hampton Bay ceiling fan, ensuring a safe and functional installation. It will cover crucial considerations such as electrical safety, wire identification, fan assembly, and troubleshooting, empowering you with the knowledge to tackle this project confidently.
Electrical Safety First
Before beginning any electrical work, it is imperative to prioritize safety. Turn off the power at the circuit breaker, ensuring that no electricity is flowing to the ceiling fan circuit. Use a non-contact voltage tester to verify that the power is off. Wear appropriate safety gear such as gloves and safety glasses. Handle wires with care, and be aware of potential hazards.
Identifying Wires
A Hampton Bay ceiling fan typically comes with three wires: black (hot), white (neutral), and green (ground). To ensure proper wiring, it is essential to identify these wires correctly. The black wire connects to the "live" terminal on the fan, while the white wire connects to the "neutral" terminal. The green wire is the ground wire and connects to the green or bare copper ground wire in the ceiling electrical box.
Assembling the Fan
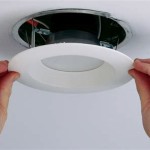
Once the wires are identified, you can assemble the ceiling fan according to the manufacturer's instructions. Mount the fan bracket securely to the ceiling electrical box. Connect the wires from the fan to the wires in the ceiling electrical box, ensuring a snug fit. Securely fasten the fan blades to the motor housing. Finally, mount the fan body onto the bracket and align it flush against the ceiling.
Troubleshooting
If you encounter any issues after wiring the fan, there are a few troubleshooting steps you can take. Check if the power is still off at the circuit breaker. Re-check the wire connections to ensure they are secure and making proper contact. Inspect the fan blades for any obstructions that may prevent them from rotating. If the fan is still not working, consult the manufacturer's instructions or consider seeking professional assistance.
Conclusion
Wiring a Hampton Bay ceiling fan requires attention to safety, proper wire identification, careful assembly, and troubleshooting skills. By following the essential aspects outlined in this article, you can install your ceiling fan with confidence. Not only will it enhance the comfort of your home, but it will also add a touch of style and elegance to your living space. Remember to prioritize safety and refer to the manufacturer's instructions for specific details and guidance.

3 Sd Ceiling Fan Pull Chain Switch Wiring Pickhvac

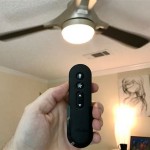
Troubleshooting Your Remote Controls Step By Hampton Bay Ceiling Fans Lighting

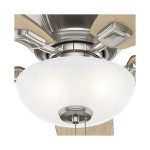
How To Install A Hampton Bay Ceiling Fan Light Kit Fans Lighting

Successful Hampton Bay Ceiling Fan Installation Projects Stories Smartthings Community

Help With Light Kit Hampton Bay Ceiling Fan Wires Output Low 2 5v Ac Voltage Works Fine No Limiter Box That I Can See Test Direct To

How To Wire A Hampton Bay Ceiling Fan Switch With Purple Black Brown And Gray Quora

Hampton Bay Lakemoore 48 In Led Indoor Outdoor Matte Black Ceiling Fan With Light Kit 50248 The Home Depot

Hampton Bay Mena 44 In Led Indoor Outdoor Matte Black Ceiling Fan With Light Kit And Reversible Blades Included 92404 The Home Depot

How To Install And Wire Ceiling Fans Lower Utility Bills Save On Heating Cooling I Can Fix Up My Home

Successful Hampton Bay Ceiling Fan Installation Projects Stories Smartthings Community
Related Posts