Lighting Symbols for Reflected Ceiling Plans in Revit
Reflected Ceiling Plans (RCPs) in Autodesk Revit are crucial for communicating the design intent for overhead elements in a space. Lighting, a critical component of any building project, relies heavily on accurate and standardized representation in RCPs. Understanding the various lighting symbols and how to utilize them effectively in Revit is essential for architects, interior designers, and electrical engineers alike.
Revit offers a robust library of pre-loaded lighting fixture families, each with a corresponding symbol specifically designed for RCPs. These symbols typically represent the fixture's shape, size, and mounting method, providing a clear visual representation of how the lighting will appear on the ceiling. They are designed to convey essential information quickly and efficiently, enabling stakeholders to understand the lighting layout at a glance.
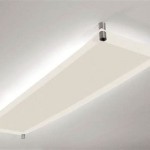
The basic components of a lighting symbol in a Revit RCP typically include a representation of the fixture's outline, indicating its dimensions and shape. This could be a circle for a downlight, a rectangle for a linear fixture, or a more complex shape for decorative lighting. The symbol also often includes an indication of the light source type, such as a central dot for a point source or parallel lines for a linear source.
Beyond basic shape and light source representation, Revit lighting symbols often incorporate additional information. Many symbols include a notation indicating the mounting type, whether recessed, surface-mounted, suspended, or wall-mounted. This is crucial for understanding the installation requirements and the overall aesthetic impact of the fixture. Some symbols also denote the direction of light emission, using arrows or other graphic elements to show whether the fixture provides uplighting, downlighting, or a combination of both.
One of the key benefits of using Revit's lighting symbols is the dynamic link between the symbol on the RCP and the 3D model of the fixture. Changes made to the fixture in the 3D view, such as adjusting its height or changing its type, are automatically reflected in the RCP symbol. This ensures consistency and accuracy throughout the project documentation.
Revit also allows for the customization of lighting symbols to meet specific project requirements. Users can modify existing families or create new ones to represent unique lighting fixtures. This flexibility enables designers to accurately represent any type of lighting, from standard downlights to complex custom-designed chandeliers.
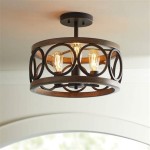
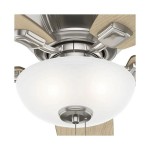
When working with lighting symbols in Revit RCPs, it’s essential to understand the different categories of lighting fixtures and their respective symbolic representations. Common categories include recessed lighting, represented by circles or squares with a central dot; surface-mounted fixtures, often depicted with a solid outline indicating the fixture housing; pendant lighting, shown as a symbol suspended from a line representing the hanging cable; and track lighting, represented by a linear symbol with multiple light source indicators.
Understanding how to control the visibility and appearance of lighting symbols in Revit is also crucial for creating clear and concise RCPs. Revit allows users to control the display of different lighting elements, such as the fixture outline, light source indicator, and mounting type notation. This allows for creating different views tailored to specific needs, such as a simplified view showing only fixture locations or a more detailed view displaying all relevant information.
The use of consistent and standardized lighting symbols in Revit RCPs significantly improves communication among project stakeholders. By adhering to industry best practices and utilizing Revit’s built-in functionality, architects, engineers, and contractors can ensure a shared understanding of the lighting design, reducing errors and facilitating a smoother construction process.
Furthermore, Revit’s ability to schedule lighting fixtures directly from the RCP provides a valuable tool for quantity takeoffs and cost estimation. The information contained within the lighting symbols, such as fixture type and manufacturer, can be used to generate detailed schedules, streamlining the procurement process.
Beyond the basic representation of lighting fixtures, Revit also allows for the depiction of lighting control systems within the RCP. Symbols for switches, dimmers, and other control devices can be added to the plan, providing a comprehensive overview of the lighting system's functionality.
Leveraging Revit’s capabilities for lighting design and documentation enables a more efficient and collaborative workflow. By understanding and correctly utilizing lighting symbols in RCPs, project teams can effectively communicate design intent, ensure accurate installation, and ultimately create successful lighting schemes.
Proper use of lighting symbols in Revit RCPs is fundamental to a well-coordinated project. These symbols not only communicate the aesthetic aspects of the lighting design but also provide critical information for installation and cost estimation, ultimately contributing to a successful project outcome.
Reflected Ceiling Plan Symbols And Meanings Edrawmax
Architectural Graphics 101 Number 1 Life Of An Architect
How To Draw A Reflected Ceiling Plan Stepwise Tutorial Edrawmax
Family Indicating Diffe Ceiling Plan Revit Forum
Revit 2024 Lights Visibility Issue In A Plan Cadline Community
Revit Trying To Add Symbolic Lines Light Fixtures For Floor Plan View Imaginit Technologies Support Blog
Solved Lighting Fixture Is Not Showing In Plan View Autodesk Community Revit S
Reflected Ceiling Plan Symbols And Meanings Edrawmax
Architectural Graphics 101 Number 1 Life Of An Architect
Chapter 5 Draw Ceiling Plans Tutorials Of Visual Graphic Communication Programs For Interior Design
Related Posts