Wiring a Ceiling Light Junction Box: A Step-by-Step Guide
Installing a ceiling light can seem like a daunting task, but with a little preparation and the right tools, you can tackle it like a pro. One crucial part of the process is wiring the ceiling light junction box. Here's a comprehensive guide to help you get it done safely and efficiently.
Materials Required
- Ceiling light fixture
- Junction box
- Electrical tape
- Wire nuts
- Screwdriver
- Wire strippers
Safety Precautions
Before you begin, make sure to turn off the power at the circuit breaker or fuse box. This will prevent any electrical shocks during the installation process.
Step 1: Install the Junction Box
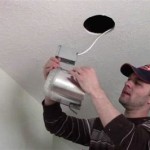
If you don't already have a junction box, you'll need to install one. Choose a location in the ceiling where you want the light fixture to be and drill a hole for the box. Secure the box in place with screws and make sure it is level.
Step 2: Feed the Wires into the Box
Identify the wires coming from the ceiling and feed them into the junction box. There should be two insulated wires (usually black and white) and a bare copper ground wire.
Step 3: Strip the Wire Ends
Using wire strippers, strip about 1/2 inch of insulation from the ends of the black, white, and ground wires. Be careful not to cut the wires.
Step 4: Connect the Black and White Wires
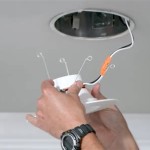
Connect the black wire from the ceiling to the black wire of the light fixture. Twist the wires together and secure them with a wire nut. Repeat this step for the white wires.
Step 5: Connect the Ground Wire
Connect the bare copper ground wire from the ceiling to the green or copper screw on the light fixture. Secure the connection with a wire nut.
Step 6: Wrap the Wires with Electrical Tape
Once the wires are connected, wrap them securely with electrical tape to insulate the connections. Make sure the tape extends beyond the wire nuts.
Step 7: Push the Wires into the Box
Push the wires back into the junction box, leaving enough slack for any future adjustments. Secure the light fixture canopy over the junction box and tighten the screws.
Step 8: Install the Light Fixture
With the wires connected and the junction box secured, you can install the light fixture. Follow the manufacturer's instructions for attaching the fixture to the canopy.
Step 9: Turn on the Power
Once the light fixture is installed, turn the power back on at the circuit breaker or fuse box. Test the light to make sure it is working properly.
Conclusion
Wiring a ceiling light junction box is a straightforward process that can be completed with a little patience and attention to detail. By following these steps carefully, you can ensure a safe and functional installation.

Extending A Lighting Circuit Step By Guide And

Extending A Lighting Circuit Step By Guide And

How To Install A Ceiling Light Fixture Diy Family Handyman

Installing Pendant Light In Ceiling Junction Box Doityourself Com Community Forums
How To Fix A Junction Box In Ceiling Quora

Help With Installing Overhead Lighting To Ceiling Junction Box R Askelectricians

Wiring A Junction Box To Be Able Move Light Fitting Diynot Forums

Sy Dimmer Wiring Hardware Home Assistant Community

Opened Up A Ceiling Fixture To Install Light And Found This Is Red Wire Sending Power Into The Grounding Circuit Details In Pics R Askanelectrician

How To Replace A Ceiling Light Fixture Dengarden
Related Posts


