How To Wire A Ceiling Fan With Light Fixture: A Comprehensive Guide
Installing a ceiling fan with a light fixture can be a rewarding home improvement project that adds both comfort and beauty to your living space. While it may seem like a daunting task, with proper planning and the right tools, you can tackle this project confidently.
1. Safety First
Before beginning any electrical work, it's crucial to ensure safety. Turn off the power to the ceiling fan circuit at the electrical panel. Use a voltage tester to verify that the power is off. Wear safety glasses and gloves for protection.
2. Gather Your Tools and Materials
You will need the following:
- Ceiling fan with light fixture
- Electrical wire
- Wire nuts
- Electrical tape
- Screwdriver
- Drill
- Voltage tester
- Safety glasses
- Gloves
3. Mount the Ceiling Fan Base
Identify the location for the ceiling fan and mark the mounting screws. Drill pilot holes and mount the ceiling fan base securely. Ensure the base is level and firmly attached to the ceiling.
4. Connect the Electrical Wires
Locate the electrical wires coming out of the ceiling: the black (hot), white (neutral), and ground (bare copper or green). Connect the fan's black wire to the black ceiling wire, the fan's white wire to the white ceiling wire, and the fan's ground wire to the ground ceiling wire. Use wire nuts to secure the connections and wrap them with electrical tape for insulation.
5. Install the Light Fixture
Attach the light fixture to the bottom of the fan mount. Connect the light fixture's electrical wires to the corresponding fan wires: black to black, white to white, and ground to ground. Secure the connections with wire nuts and electrical tape.
6. Secure the Fan Blades
Align the fan blades with the blade arms and attach them securely using the provided screws. Ensure the blades are evenly spaced and balanced.
7. Test the Fan
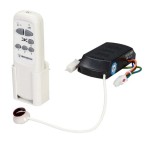
Turn on the power at the electrical panel and use the remote control or wall switch to operate the fan. Verify that the fan and light fixture function correctly.
8. Troubleshooting
If you encounter any issues, check the following:
- Ensure all connections are secure and properly insulated.
- Verify that the power is on and reaching the ceiling fan circuit.
- Check the remote control battery or the wall switch.
Conclusion
By following these steps carefully, you can successfully wire a ceiling fan with a light fixture, enhancing the comfort and style of your home. Remember to prioritize safety and don't hesitate to seek professional assistance if needed.

Replacing A Ceiling Fan Light With Regular Fixture Jlc
Replacing A Ceiling Fan Light With Regular Fixture Jlc

How To Replace A Ceiling Fan With Pendant Light

Wiring A Ceiling Fan And Light With Diagrams Ptr

How To Replace A Ceiling Fan With Pendant Light

Replace Light Fixture W Ceiling Fan R Askanelectrician
How To Wire A Ceiling Fan Light Switch Quora
Ceiling Fan Light Fixture Replacement Ifixit Repair Guide

Wiring A Ceiling Fan Light Part 2

Ceiling Fan Wiring Diagram Power Into Light
Related Posts

