How To Install Ceiling With Recessed Lighting
Installing recessed lighting is a great way to add style and functionality to your home. Recessed lights are versatile and can be used in any room, from kitchens and bathrooms to living rooms and bedrooms. They provide even lighting, are easy to maintain, and can help to create a more spacious feel in a room.
Installing recessed lighting is a relatively simple process, but there are a few things you need to know before you get started. In this article, we'll walk you through the essential steps of installing recessed lighting, from choosing the right lights to wiring and finishing the installation.
1. Choose the Right Lights
The first step is to choose the right recessed lights for your needs. There are a few things to consider when making your selection, including the size of the room, the type of ceiling, and the amount of light you need.
Recessed lights come in a variety of sizes, from small 4-inch lights to larger 6-inch lights. The size of the light you need will depend on the size of the room and the amount of light you need.
Recessed lights can be installed in any type of ceiling, but the installation process will vary depending on the type of ceiling you have. If you have a drywall ceiling, the installation process will be relatively simple. However, if you have a plaster or wood ceiling, the installation process will be more complex.
Finally, you need to consider the amount of light you need. Recessed lights can provide a variety of light levels, from soft ambient light to bright task lighting. The amount of light you need will depend on the purpose of the room.
2. Wire the Lights
Once you have chosen the right lights, you need to wire them. The wiring process will vary depending on the type of lights you have chosen and the type of ceiling you have. However, there are a few general steps that you can follow:
- Turn off the power to the room at the circuit breaker.
- Remove the existing light fixture.
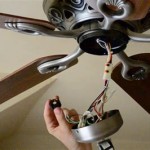
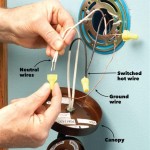
- Connect the wires from the new light to the wires from the ceiling.
- Secure the light to the ceiling.
- Turn on the power to the room.
3. Finish the Installation
Once the lights are wired, you need to finish the installation. The finishing process will vary depending on the type of lights you have chosen. However, there are a few general steps that you can follow:
- Install the trim around the lights.
- Paint the trim to match the ceiling.
- Install the light bulbs.
- Turn on the lights and enjoy your new lighting!

How To Installing Recessed Lighting Upshine

How To Install Recessed Lighting Fixthisbuildthat

Installing Recessed Lighting Fine Homebuilding

How To Install Recessed Lighting Like A Pro Our Home Made Easy

8 Recessed Lighting Installation Tips For Diyers Bob Vila

How To Install Recessed Lighting Fixthisbuildthat

How To Install Recessed Lights In A Drop Ceiling Temecula Handyman

Recessed Lighting Installation Bob Vila

How To Install New Work Recessed Lighting

Energy Star Ask The Experts S
Related Posts


