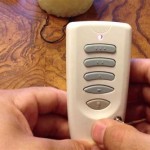
Essential Aspects of Installing a Wireless Remote Ceiling Fan
Understanding the crucial aspects of installing a wireless remote ceiling fan is imperative to ensure a safe and efficient operation. This article will delve into these essential elements, providing a comprehensive guide for a successful installation. ### 1. Safety Precautions Commencing any electrical work necessitates adherence to safety protocols. Before initiating the installation, ensure the electricity supply to the fan is disconnected at the circuit breaker or fuse panel. Additionally, verify that the fan's blades are securely fastened to the motor's housing to prevent any potential hazards during installation. ### 2. Location Selection Choosing an appropriate location is crucial for optimal fan performance and safety. Ceiling fans should be installed in the center of a room, at least 8 feet above the floor and 18 inches from any walls or obstructions. This ensures proper airflow and prevents any accidental contact with the fan's blades. ### 3. Electrical Wiring Electrical wiring is a critical aspect of installing a ceiling fan. Use insulated electrical wire designed for ceiling fan applications, and ensure all connections are made securely with wire nuts or electrical tape. Connect the fan's wires to the appropriate wires in the ceiling junction box, ensuring proper polarity (black to black, white to white, and green to ground). ### 4. Mounting the Fan Properly mounting the fan to the ceiling is essential for its stability and safety. Utilize the provided mounting bracket and secure it to the ceiling joists using the appropriate hardware. Carefully lift the fan onto the mounting bracket and ensure it is securely attached. ### 5. Installing the Wireless Receiver The wireless receiver is responsible for receiving signals from the remote control and controlling the fan's operation. Mount the receiver inside the fan's canopy, using the provided mounting hardware. Connect the receiver's wires to the appropriate wires on the fan's motor, ensuring the correct polarity. ### 6. Programming the Remote Control Program the remote control to communicate with the wireless receiver. Typically, this involves pressing a series of buttons on the receiver and the remote control to establish a connection. Once programmed, the remote control can be used to adjust the fan's speed, light settings, and other functions. ### 7. Testing and Troubleshooting Upon completion of the installation, turn the electricity back on and test the fan's operation. Verify that the fan rotates smoothly and responds to the remote control's commands. If any issues arise, consult the manufacturer's instructions for troubleshooting tips and potential solutions. ### Conclusion Installing a wireless remote ceiling fan requires careful attention to the essential aspects outlined in this article. Observing safety precautions, selecting an appropriate location, performing correct electrical wiring, mounting the fan securely, installing the wireless receiver, programming the remote control, and testing and troubleshooting are all crucial steps towards achieving a successful installation. By following these guidelines, you can enhance the comfort and convenience of your living space with a wireless remote ceiling fan that operates safely and efficiently.
How To Wire A Ceiling Fan Control Using Dimmer Switch

Converting An Existing Ceiling Fan To A Remote Control

Ceiling Fan Remote Troubleshooting Temecula Handyman

Remote Control Intelligent English Version Wireless Easy Installation For Ceiling Fans Com
My Wireless Remote Control Ceiling Fan Has A Gray Red And Yellow Wire Labeled To Motor Coming From The Transponder Where Do I Connect Toggle Switch

The Easy Install Wireless Socket Fan Hammacher Schlemmer

Ceiling Fan Remote Troubleshooting Temecula Handyman

Universal Ceiling Fan And Light Remote Control Kit Add A No In Wall Wiring Required Switch Sd Timming On Off Scene With Receiver Plate

Upgrade Your Airflow 3 Ways To Smarten Ceiling Fans Wirecutter


