How To Replace A Ceiling Junction Box
A ceiling junction box is an important part of your home's electrical system, as it provides a safe and secure way to connect multiple electrical wires together. However, over time, junction boxes can become damaged or outdated, requiring replacement. If you're facing this issue, here's a step-by-step guide to help you replace a ceiling junction box safely and efficiently.
1. Gather the Necessary Tools and Materials:
Before starting the replacement process, ensure you have the following tools and materials:
- New ceiling junction box (make sure it's the right size and type for your needs)
- Screwdriver
- Wire strippers
- Electrical tape
- Replacement screws (if needed)
- Junction box cover
- Safety glasses
- Work gloves
2. Safety First:
Before beginning any electrical work, always remember to turn off the power to the circuit connected to the junction box. You can do this by switching off the appropriate breaker in your home's electrical panel or by removing the fuse.
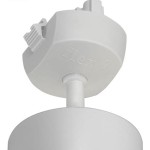
3. Remove the Old Junction Box:
Once the power is off, use a screwdriver to remove the screws holding the old junction box in place. Carefully disconnect the wires from the old junction box by loosening the wire nuts or terminals. Be meticulous in labeling each wire with a piece of tape, indicating its connection point.
4. Prepare the New Junction Box:
Position the new junction box in place and mark the locations for the mounting screws. Drill pilot holes at these marked locations to ensure a secure fit for the screws.
5. Install the New Junction Box:
Place the new junction box over the drilled holes and secure it using the provided screws. Make sure the box is positioned correctly and sits flush against the ceiling.
6. Reconnect the Wires:
Reconnect the wires to the new junction box. Use wire nuts or terminals to secure the connections, ensuring they are tight and secure. Double-check the connections to ensure they are properly made.
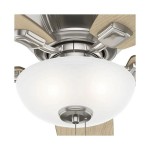
7. Install the Junction Box Cover:
Once all the wires are reconnected, install the junction box cover. Make sure the cover fits snugly and is properly secured to prevent any exposed wires or electrical hazards. Switch the power back on.
8. Verify Functionality:
After completing the replacement, turn on the power to the circuit and check if all the connected lights or fixtures are functioning correctly. If everything works as intended, you have successfully replaced your ceiling junction box.
Remember, electrical work can be dangerous if not handled properly. If you are uncertain about any aspect of the process, it's advisable to consult a qualified electrician to ensure the replacement is done safely and effectively.

How To Remove Replace This Ceiling Junction Box R Askanelectrician

How To Remove Replace An Old Electrical Ceiling Box Diy Home Improvement Forum

How To Remove Replace This Ceiling Junction Box R Askanelectrician

Installing Pendant Light In Ceiling Junction Box Doityourself Com Community Forums

How To Remove Replace An Old Electrical Ceiling Box Diy Home Improvement Forum

Electric Box For Ceiling Fan Install Doityourself Com Community Forums

How Are These S Stuck In This Ceiling Junction Box R Askanelectrician

Repairing A Ceiling Electrical Box

Need Help Replacing Plastic Light Box With Metal For Ceiling Fan Installation R Askanelectrician
Related Posts