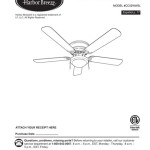
Troubleshooting a Non-Working Ceiling Fan Light Socket
A non-functioning ceiling fan light socket can be a minor inconvenience or a major safety hazard, depending on the circumstances. Whether you're dealing with a flickering light, complete darkness, or a buzzing sound, it's essential to identify and address the problem promptly. This article will guide you through the necessary steps to troubleshoot and repair a non-working ceiling fan light socket.
1. Safety Precautions
Electrical work can be dangerous, so always take necessary safety precautions before beginning any repairs. Turn off the power to the ceiling fan at the circuit breaker or fuse box and ensure that it is completely disconnected from any power source. Use a non-conductive ladder or step stool for working at heights and wear rubber-soled shoes for added protection against electrical shocks.
2. Check the Bulb
The most common cause of a non-working light socket is a faulty bulb. Remove the bulb and inspect it for any visible signs of damage, such as broken filaments or a burned-out appearance. Replace the bulb with a new one of the same wattage and type.
3. Inspect the Socket
Once the bulb has been replaced, inspect the socket itself. Look for any loose connections, burnt contacts, or damage to the wiring. Tighten any loose screws or terminals and replace any damaged components.
4. Check the Wiring
If the socket appears to be in good condition, check the wiring. Use a voltage tester to ensure that power is reaching the socket. If there is no power, check the connections at the ceiling box and the switch. If the wiring is damaged, it may need to be replaced.
5. Test the Switch
If there is power to the socket but the light still doesn't work, test the switch. Remove the switch plate and check for any loose connections or damage. Use a voltage tester to ensure that the switch is functioning properly.
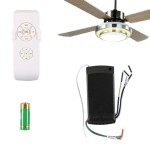
6. Check the Remote Control (if applicable)
If your ceiling fan has a remote control, check if its batteries need replacing. Also, ensure that the remote is paired correctly with the fan and that there are no obstacles blocking the signal.
7. Reset the Circuit Breaker or Fuse
If all else fails, reset the circuit breaker or fuse associated with the ceiling fan. This can sometimes resolve electrical issues that may have caused the light socket to malfunction.
Conclusion
By following these troubleshooting steps, you can effectively identify and repair a non-working ceiling fan light socket. However, if you are not comfortable performing electrical work yourself, it is always advisable to consult a qualified electrician to ensure safe and proper repairs.

Solving 5 Common Light Fixture Problems

Ceiling Fan Works But Lights Don T Solved Home Repair Geek

Ceiling Fan Works But Lights Don T Solved Home Repair Geek

Ceiling Fan Troubleshooting The Home Depot

Ceiling Fan Works But Lights Don T Solved Home Repair Geek

Ceiling Fan Light Troubleshooting The Home Depot

Replacing A Ceiling Fan Light With Regular Fixture Jlc

Ceiling Fan Light Troubleshooting The Home Depot

Bell Howell Socket Fan Ceiling With Light Into Any Remote Control Color White Jcpenney

Bell And Howell Socket Ceiling Fan With White Finish Light Adjustable 1000 Lumens 4 Blades Com
Related Posts