How to Install a Hunter Ceiling Fan Light Kit
Installing a Hunter ceiling fan light kit is a relatively simple task that can be completed in a few hours. By following these step-by-step instructions, you can ensure that your new light kit is installed safely and correctly.
Materials you will need:
- Hunter ceiling fan light kit
- Screwdriver
- Electrical tape
- Wire nuts
Step 1: Turn off the power
Before you begin, it is important to turn off the power to the ceiling fan at the circuit breaker or fuse box. This will prevent any electrical shock hazards.
Step 2: Remove the old light kit (if applicable)
If your ceiling fan already has a light kit installed, you will need to remove it before you can install the new one. To do this, simply unscrew the screws that hold the light kit in place and carefully remove it.
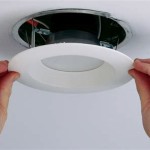
Step 3: Install the mounting bracket
The mounting bracket is the part of the light kit that attaches to the ceiling fan. To install the mounting bracket, first locate the two screws that are located on the top of the ceiling fan motor housing. Hold the mounting bracket up to the screws and align the holes. Insert the screws through the holes and tighten them down.
Step 4: Connect the wires
Now it is time to connect the wires from the light kit to the wires from the ceiling fan. The wires from the light kit will be labeled with either a black or white wire. The black wire should be connected to the black wire from the ceiling fan, and the white wire should be connected to the white wire from the ceiling fan. Use wire nuts to secure the connections and then wrap them with electrical tape.
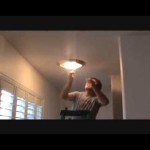
Step 5: Install the light kit
Once the wires are connected, you can install the light kit. To do this, simply lift the light kit up to the mounting bracket and align the holes. Insert the screws through the holes and tighten them down. Be careful not to overtighten the screws.
Step 6: Install the light bulbs
Now you can install the light bulbs. The Hunter ceiling fan light kit comes with two 60-watt light bulbs. Simply screw the light bulbs into the sockets.
Step 7: Turn on the power
Once the light bulbs are installed, you can turn on the power to the ceiling fan. To do this, simply flip the switch at the circuit breaker or fuse box. The light kit should now be working properly.
Tips
- If you are not comfortable working with electricity, it is best to hire a qualified electrician to install the light kit for you.
- Make sure that the ceiling fan is turned off and the power is turned off before you begin working.
- Be careful not to overtighten the screws when installing the light kit.
- If you have any questions, please consult the instructions that came with the light kit.
Conclusion
Installing a Hunter ceiling fan light kit is a simple task that can be completed in a few hours. By following these step-by-step instructions, you can ensure that your new light kit is installed safely and correctly.

Installation Instructions For Hunter Ceiling Fan

Wiring A Ceiling Fan And Light With Diagrams Ptr

Hunter Fans How To Install Your Ceiling Fan Cpo S

Hunterexpress Easy Installation Ceiling Fan Hunter

Changing Ceiling Fan Light Kit Doityourself Com Community Forums

How To Install A Hunter Ceiling Fan Light Kit

Hunter Newsome 52 In Indoor Premier Broe Bowl Light Kit Ceiling Fan 53311 The Home Depot

Hunter Apex Led 52 Reversible Blade Ceiling Fan Costco

Hunter 52 Inch Georgetown Matte Silver Ceiling Fan With Led Light Kit And Handheld Remote Com

Hunter Georgetown 52 In Integrated Led Indoor Matte Black Ceiling Fan With Light Kit And Remote Included 51879 The Home Depot
Related Posts