Hanging a Ceiling Fan With Light Kit: A Step-by-Step Guide
Adding a ceiling fan with a light kit to your home can be a great way to improve both the comfort and the style of your space. Ceiling fans can help to circulate air, keeping you cool in the summer and warm in the winter. They can also provide additional lighting, which can be helpful in rooms that don't have a lot of natural light. If you're thinking about installing a ceiling fan with a light kit, here's a step-by-step guide to help you get the job done right.
1. Gather Your Materials
Before you begin, you'll need to gather all of the materials you'll need. This includes the ceiling fan, the light kit, a screwdriver, a drill, a level, and a wire stripper. If you're not sure which type of ceiling fan or light kit to buy, be sure to consult with a qualified electrician.
2. Turn Off the Power
Once you have all of your materials, the first step is to turn off the power to the room where you'll be installing the ceiling fan. This is important for safety reasons, as you don't want to risk getting shocked while you're working.
3. Remove the Old Fixture
If you're replacing an old ceiling fan or light fixture, you'll need to remove it before you can install the new one. To do this, simply unscrew the mounting screws and carefully remove the old fixture.
4. Install the Mounting Bracket
The next step is to install the mounting bracket for the ceiling fan. The mounting bracket is typically included with the fan, and it will need to be screwed into the ceiling joists. Be sure to use a level to make sure that the mounting bracket is level, and be sure to tighten the screws securely.
5. Wire the Ceiling Fan
Once the mounting bracket is installed, you can begin wiring the ceiling fan. The wiring diagram will be included with the fan, and it's important to follow the instructions carefully. Be sure to connect the wires correctly, and be sure to use wire nuts to secure the connections.
6. Mount the Ceiling Fan
Once the ceiling fan is wired, you can mount it to the mounting bracket. To do this, simply lift the fan into place and secure it with the mounting screws. Be sure to tighten the screws securely, but be careful not to overtighten them.
7. Install the Light Kit
Once the ceiling fan is mounted, you can install the light kit. The light kit is typically included with the fan, and it will need to be screwed into the fan's canopy. Be sure to tighten the screws securely, but be careful not to overtighten them.
8. Turn On the Power
Once the ceiling fan and light kit are installed, you can turn on the power to the room. The fan should start running, and the light should turn on. If either the fan or the light doesn't work, check the wiring to make sure that it's correct.
9. Balance the Ceiling Fan
Once the ceiling fan is running, you may need to balance it. A ceiling fan that is not balanced will wobble, which can be annoying and even dangerous. To balance the ceiling fan, simply follow the instructions included with the fan.
10. Enjoy Your New Ceiling Fan
Once the ceiling fan is balanced, you can enjoy your new ceiling fan and light kit! Ceiling fans can help to improve the comfort and the style of your home, and they can also save you money on your energy bills.

Ceiling Fan Light Kit Installation How To

How To Install A Ceiling Fan Light Kit Shockley Electric

How To Add A Light Kit Your Ceiling Fan Mr Electric

Ceiling Fan Light Kit Installation How To

Changing Ceiling Fan Light Kit Doityourself Com Community Forums

Help Installing Ceiling Fan Light Kit R Askanelectrician

Help Installing Ceiling Fan Light Kit R Askanelectrician

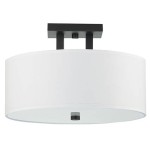
Drum Ceiling Fan Light Kit Of Rustic Galvanized White Farmhouse Flush Mount Lighting Chandelier Kitchen Lamp Hanging Industrial

Wiring Ceiling Fan Light Kit Removing A Wire Cap Doityourself Com Community Forums

Craftmade Pro Plus 112 Slim Light Kit 52 In Satin Brass Indoor Downrod Or Flush Mount Ceiling Fan With 5 Blade The Fans Department At Com
Related Posts


