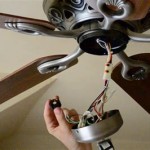
How to Install a Ceiling Fan with a Light Switch
Installing a ceiling fan with a light switch may seem like a daunting task, but it is surprisingly easy to do it yourself with a little preparation. By following these step-by-step instructions, you can add style and functionality to your home in just a few hours.
Step 1: Gather the Necessary Tools and MaterialsBefore you begin, make sure you have all the necessary tools and materials on hand. You will need:
- Ceiling fan with light kit
- Light switch
- Electrical wire
- Wire nuts
- Screwdriver
- Drill
- Outlet box
- Mounting bracket
Safety first! Before starting any electrical work, turn off the power at the breaker panel. Locate the breaker that controls the power to the ceiling fan and switch it to the "Off" position.
Step 3: Remove the Old Light FixtureIf there is an existing light fixture where you want to install the ceiling fan, you will need to remove it. Turn the power back on at the breaker panel and turn on the light switch to illuminate the wires. Then, turn the power back off at the breaker panel.
Carefully remove the light fixture by unscrewing the mounting screws and disconnecting the wires. Cap the exposed wires with wire nuts.
Step 4: Install the Outlet BoxThe ceiling fan will be mounted on an outlet box that is securely attached to the ceiling joists. If there is not an existing outlet box in the desired location, you will need to install one.
Locate a ceiling joist and mark the center point where the outlet box will be installed. Use a drill to create a hole for the outlet box and feed the wires through the hole.
Attach the outlet box to the ceiling joist using the provided screws. Make sure the box is level and secure.
Step 5: Mount the Ceiling FanAttach the mounting bracket to the outlet box using the provided screws. Then, lift the ceiling fan onto the mounting bracket and secure it with the provided screws.
Step 6: Wire the Ceiling FanNow, it's time to connect the electrical wires. Follow these steps carefully:
- Connect the black wire from the ceiling fan to the black wire in the outlet box.
- Connect the white wire from the ceiling fan to the white wire in the outlet box.
- Connect the ground wire from the ceiling fan to the green or bare copper wire in the outlet box.
- Secure all connections with wire nuts.
Now, you can install the light fixture that came with your ceiling fan. Attach the light fixture to the mounting bracket and secure it with the provided screws.
Step 8: Install the Light SwitchIf you are installing a new light switch, follow these steps:
- Turn off the power at the breaker panel.
- Remove the faceplate from the old switch.
- Disconnect the wires from the old switch and cap them with wire nuts.
- Connect the black wire from the new switch to the black wire in the outlet box.
- Connect the white wire from the new switch to the white wire in the outlet box.
- Secure all connections with wire nuts.
- Install the new switch into the electrical box and secure it with the provided screws.
- Install the faceplate onto the new switch.
Turn on the power at the breaker panel and flip the new light switch. The ceiling fan and light should turn on. If not, check your connections and make sure everything is secure.
Congratulations! You have successfully installed a ceiling fan with a light switch. Enjoy the added comfort and style in your home.

Wiring A Ceiling Fan And Light With Diagrams Ptr
My Ceiling Fan Has Black And White Wire Red How Do I Connect Them Quora

How To Wire A Ceiling Fan Control Using Dimmer Switch

Wiring A Ceiling Fan And Light With Diagrams Ptr

How To Wire A Ceiling Fan Control Using Dimmer Switch

Wiring A Ceiling Fan And Light With Diagrams Ptr

Ceiling Fan Switch Wiring Electrical 101

Ceiling Fan Wiring Diagram With Light Dimmer

How To Wire A Ceiling Fan For Separate Control Fo The And Light

Wiring A Ceiling Fan And Light With Diagrams Ptr
Related Posts


