Adding LED Can Lights to Existing Ceiling: A Comprehensive Guide
Upgrading your home's lighting with recessed LED can lights is an excellent way to enhance aesthetics and energy efficiency. While the installation process may seem daunting, it is achievable with careful planning and the right tools. Here's a detailed guide to help you navigate the essentials of adding LED can lights to your existing ceiling:
1. Determine the Lighting Layout and Fixture Type
Before selecting LED can lights, determine the desired lighting layout for each room. Consider factors such as the room's size, purpose, and existing fixtures. Choose the appropriate can light fixture type, such as recessed, semi-recessed, or eyeball, based on the desired style and beam spread.
2. Prepare the Ceiling Opening
Using a hole saw or drywall saw, carefully create the circular opening in the ceiling for the can light fixture. Ensure the opening is the correct size for the selected fixture. Smooth the edges of the opening with a utility knife or sandpaper to remove any burrs or splinters.
3. Connect the Electrical Wires
Locate the existing electrical box and properly connect the LED can light wires to the power supply. Use wire connectors or terminal blocks for secure connections. Follow the manufacturer's instructions for wire gauge and connection type. Ensure all connections are tight and insulated to prevent any electrical hazards.
4. Install the Junction Box
Secure the junction box to the ceiling joist, ensuring it aligns with the prepared opening. The junction box provides a safe enclosure for the wire connections and supports the can light fixture. Use screws or nails to fasten the junction box securely.
5. Connect the Can Light Fixture
Gently push the can light fixture into the junction box, ensuring the fixture's tabs or screws align with the slots or holes in the box. Securely tighten the screws or push the spring clips until the fixture is firmly in place. The manufacturer's instructions may vary, so refer to those for specific mounting methods.
6. Install the Trim Ring
Once the can light fixture is installed, attach the trim ring around the opening. The trim ring beautifies the lighting fixture, providing a seamless finish and hiding any gaps between the fixture and the ceiling. Trim rings are typically secured with screws or spring clips.
7. Install the LED Bulb
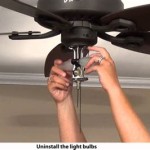
Finally, install the LED light bulb into the can light fixture. Ensure the bulb is compatible with the fixture and wattage requirements. LED bulbs are known for their energy efficiency and long lifespan, making them a cost-effective and eco-friendly choice for lighting.
Tips for Successful Installation:
- Wear safety gear, including gloves and eye protection.
- Plan the wiring connections carefully and use proper gauges.
- Secure all electrical connections tightly and insulate them well.
- Test the lights before completing the installation.
- Consult with a qualified electrician if encountering electrical difficulties.
Conclusion:
Adding LED can lights to your existing ceiling is a rewarding project that can elevate your home's ambiance while reducing energy consumption. By following these comprehensive steps and adhering to safety precautions, you can achieve a professional-looking installation. Remember to customize the lighting layout and select appropriate fixtures to create an optimal lighting environment that meets your needs.

How To Install Recessed Lighting Fixthisbuildthat

Installing Recessed Lighting For Dramatic Effect Diy Family Handyman

How To Install Led Recessed Lighting In Existing Ceiling Info

Energy Star Ask The Experts S

How To Add Can Lights Existing Ceiling Out And Guide Home Planet

8 Recessed Lighting Installation Tips For Diyers Bob Vila

How To Install Recessed Lighting Fixthisbuildthat

Eaton Halo Rl56 Review Upgrade Your Existing Canisters To Smart And Efficient Led Lighting Techhive

How To Install Recessed Lighting Fixthisbuildthat

Installing Recessed Lighting For Dramatic Effect Diy Family Handyman
Related Posts


