Bathroom Ceiling Lights DIY: Illuminate Your Bathroom with Style and Functionality
Upgrading the lighting in your bathroom can transform its ambiance and enhance its functionality. Installing new ceiling lights is a relatively straightforward DIY project that can be completed with a few simple tools and materials. Here's a comprehensive guide to help you create a well-lit and stylish bathroom space.
Choosing the Right Ceiling Lights
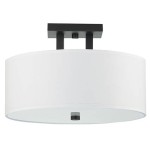
Consider the size and shape of your bathroom when selecting ceiling lights. A small bathroom may benefit from a single pendant light or flush mount fixture, while larger bathrooms may require multiple lights. For a modern and airy look, opt for recessed lighting. Choose fixtures with adjustable bulbs to direct light where needed.
Materials Required
To complete this project, you'll need the following materials:
- Ceiling lights
- Electrical wire and connectors
- Electrical tape li>Screwdriver
- Wire strippers
- Safety glasses
Step-by-Step Installation Guide
Follow these steps to install your bathroom ceiling lights:
1. Safety First
Turn off the power at the circuit breaker before beginning any electrical work. Wear safety glasses to protect your eyes from debris.
2. Remove Existing Fixtures
If there are existing ceiling lights, carefully remove them by disconnecting the wires and unscrewing the mounting bracket.
3. Prepare the Electrical Box
Locate the electrical box where the new lights will be installed. If there is not an existing box, you will need to install one. Make sure the box is securely attached to the ceiling joists.
4. Connect the Wires
Strip about 1/2 inch of insulation from the ends of the electrical wires. Twist together the black and white wires from the fixture with the corresponding colored wires from the electrical box. Secure the connections with wire connectors and electrical tape.
5. Mount the Fixture
Position the light fixture over the electrical box and secure it using the mounting screws. Ensure the fixture is firmly attached.
6. Install the Bulbs
Screw in the light bulbs into the sockets. Choose bulbs with the appropriate wattage and color temperature for your desired lighting effect.
7. Test the Lights
Turn the power back on at the circuit breaker. Test the lights to ensure they are working correctly. If any lights are not working, troubleshoot the connections.
Tips for a Successful DIY
Follow these tips to ensure a successful DIY bathroom ceiling light installation:
- If you are not comfortable working with electricity, consult a licensed electrician.
- Use a level to ensure the light fixture is installed evenly.
- Consider the height of the ceiling when choosing the length of the light fixture.
- Add a dimmer switch to adjust the brightness of the lights.
Conclusion
Installing ceiling lights in your bathroom is a rewarding DIY project that can enhance the style and functionality of your space. By following the steps outlined in this guide, you can create a well-lit and inviting bathroom environment.

How To Build A Diy Bathroom Light Fixture From Ceiling Thediyplan

How To Build A Diy Bathroom Light Fixture From Ceiling Thediyplan

How To Spray Paint Bathroom Light Fixtures Making Maanita

Sean S Diy Bathroom Lighting Makeover Apartment Therapy

Camouflaging A Dated Bathroom Light Fixture Engineer Your Space

Diy Industrial Bathroom Light Fixtures

How To Build A Diy Bathroom Light Fixture From Ceiling Thediyplan

Install A Bathroom Light Yourself Louie Lighting Blog

Bathroom Light Fixture Makeover Sawdust Sisters

Moderne Vanity Light Cover Conversion Kit 32 W White Textured Fabric Shade Diy Upgrades Hollywood Lights No Wiring Com
Related Posts

