Essential Aspects of Ceiling Fan Light Fitting
Ceiling fans with lights are a versatile addition to any room, providing both illumination and air circulation. Installing one can enhance comfort and style, but it's crucial to consider essential aspects to ensure safety and functionality.
1. Electrical Safety
Before beginning, ensure you understand basic electrical principles and safety precautions. Turn off the main power supply to the circuit where the fan will be installed. Verify with a voltage tester that the wires are not live before proceeding.
2. Choosing the Right Fan
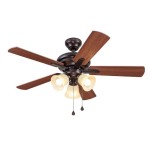
Consider the size of the room and ceiling height when selecting a fan. A fan too small will be ineffective, while an oversized fan can cause turbulence or interfere with other fixtures. Ensure the fan has an appropriate downrod length to maintain a comfortable distance from the ceiling.
3. Mounting the Base
The fan's mounting base is attached directly to the ceiling electrical box. Ensure the box is firmly secured and can support the weight of the fan. Use the provided mounting screws or bolts, tightening them securely but not overtightening.
4. Wiring the Electrical
Connect the fan's wires (typically black, white, and green) to the corresponding wires in the electrical box using wire nuts. Securely twist the wires together inside the wire nuts and cover them with electrical tape for insulation.
5. Installing the Light Kit
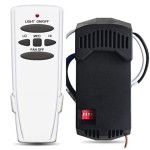
Light kits are typically installed after the fan motor is in place. Follow the manufacturer's instructions to connect the light fixture to the fan and mount it securely. Verify that all wires are properly insulated and hidden.
6. Balancing the Fan
Once the fan is assembled and wired, it's essential to balance it properly. Use a balancing kit or follow the manufacturer's specific instructions to eliminate any wobble or vibration during operation.
7. Adding the Blades
Secure the fan blades to the motor housing using the provided screws or bolts. Ensure they are tightened securely without overtightening. If the blades are not properly balanced, it can lead to excessive noise and vibration.
8. Testing and Finishing
Turn on the power and test the fan. Ensure the motor operates smoothly, the light functions properly, and there are no unusual noises. Once everything is working as intended, secure any loose wires or connections and enjoy the benefits of your new ceiling fan with light.

Matching Ceiling Fan And Lighting Fixtures For 2024 Spring Hunter

Glass Ball Ceiling Fan Light Mooielight

All About Ceiling Fan Light Kits Ideas Advice Lamps Plus

Dinglilighting Industrial Ceiling Fan With Light 42 Vintage Acrylic Chandelier Fixtures Remote Retractable Blades For Living Room Kitchen Bedroom 5 E26 Base Com

3 Light Ceiling Fan Kit Maxim Lighting

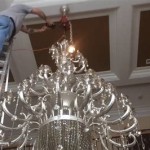
Replacing A Ceiling Fan Light With Regular Fixture Jlc

Glass Ball Ceiling Fan Light Mooielight

How To Choose A Light Bulb For Your Ceiling Fan

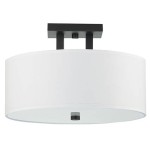
Ceiling Fan Light Kit Only Of Modern Milk Glass Globes Flush Mount Lighting Bathroom Kitchen Fixture Farmhouse Mid Century Track Lampgoods

Dinglilighting Industrial Ceiling Fan With Light 42 Vintage Acrylic Chandelier Fixtures Remote Retractable Blades For Living Room Kitchen Bedroom 5 E26 Base Com
Related Posts