Essential Aspects of Ceiling Light Fixture Bulb Change
Maintaining well-lit spaces is crucial for safety, comfort, and productivity. Ceiling light fixtures play a significant role in illuminating interiors, and changing bulbs is a simple task that requires minimal effort. However, understanding the essential aspects of this process ensures a seamless and hazard-free experience.
Safety Precautions
Before embarking on any electrical work, it is imperative to prioritize safety. Turn off the power to the light fixture at the circuit breaker or fuse box. This step eliminates the risk of electrical shock.
Inspect the light fixture for any damage, such as loose wires or broken glass. If any anomalies are detected, refrain from proceeding and contact an electrician for professional assistance.
Bulb Selection
The type of bulb required for your ceiling light fixture depends on its socket size and compatibility. Consult the manufacturer's instructions or the fixture itself for specific bulb specifications.
Various bulb options are available, including incandescent, fluorescent, LED, and halogen bulbs. Each type offers unique advantages and disadvantages in terms of lifespan, energy efficiency, and light quality. Research and determine which bulb best suits your needs before making a purchase.
Removing the Old Bulb
Once the correct bulb has been selected, it is time to remove the old one. Pull the bulb firmly straight down or unscrew it if it has a base designed for twisting.
If the bulb is stuck, try using a rubber glove to enhance grip or a cloth to wrap around the bulb for better traction. Twist or pull gently to avoid damaging the socket or fixture.
Installing the New Bulb
Carefully align the new bulb with the socket. If it is a screw-type base, gently twist it clockwise until secure. For a push-in base, insert the bulb into the socket and push it in firmly.
Double-check the bulb's fit to ensure it is securely in place. Turn the power back on at the circuit breaker or fuse box. If the bulb does not light up, recheck the bulb's compatibility or contact an electrician.
Additional Tips
Regularly clean light fixtures to prevent dust accumulation, which can interfere with bulb performance.
Avoid touching the new bulb with bare fingers, as oils from the skin can shorten its lifespan. Use a cloth or glove when handling the bulb.
Dispose of old bulbs properly at designated recycling facilities. Do not throw them away in regular trash.
By following these essential aspects, you can safely and effectively change ceiling light fixture bulbs, ensuring your interiors remain well-lit and comfortable for years to come.
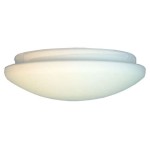
Dome Ceiling Light Bulb Replacement Ifixit Repair Guide

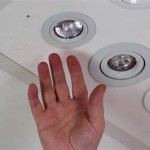
Easy Ways To Replace An Led Recessed Light Bulb 13 Steps

How To Change A Recessed Light Bulb

How To Replace A Ceiling Light Home

3 Easy Ways To Change A Ceiling Light Bulb Wikihow

How Do I Replace The Bulb In This Enclosed Bathroom Ceiling Light Hometalk
Dome Ceiling Light Bulb Replacement Ifixit Repair Guide

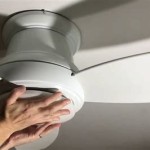
How To Open Twist Off The Cover Of Some Really Stupid Awkward Flush Mounted Ceiling Light Dome Fittings Fixtures Replace Change Bulb My Technical Blog

How Do I Remove These Ceiling Lights To Replace The Bulb R Fixit
Dome Ceiling Light Bulb Replacement Ifixit Repair Guide
Related Posts

