Essential Aspects of Ceiling Light Fixture Installation Instructions
Installing ceiling light fixtures can enhance the ambiance and functionality of any room. However, to ensure a safe and effective installation, it's crucial to follow the provided instructions carefully. Here are some essential aspects to pay attention to while navigating ceiling light fixture installation instructions:
1. Safety Precautions
Always begin by ensuring your safety. Turn off the power at the breaker panel before starting the installation. Wear safety glasses and gloves to protect against electrical hazards or accidental breakage. Secure a stable ladder to access the ceiling safely.
2. Identifying Fixture Components
Before installation, unpack the fixture components and identify all parts as per the instructions. Typically, fixtures include the main body, mounting bracket, canopy, and screws. Refer to the instructions for any additional components or accessories.
3. Wiring and Connection
Most ceiling fixtures come with pre-wired components. If wiring is required, follow the instructions precisely. Match the wire colors to the appropriate terminals and ensure proper grounding. Avoid loose connections to prevent electrical malfunctions.
4. Mounting the Bracket
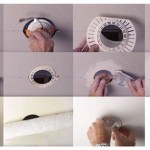
The mounting bracket serves as the base for the fixture. Install it securely to the junction box in the ceiling. Use the appropriate screws or bolts as specified in the instructions. Ensure the bracket is level and firmly attached.
5. Connecting the Fixture
Once the bracket is mounted, carefully align the fixture's electrical connections with the wires in the junction box. Make sure the connections are tight and properly secured. Lift the fixture and connect it to the bracket, typically with screws or a twist-lock mechanism.
6. Attaching the Canopy
The canopy conceals the junction box and wiring. Slide the canopy over the mounting bracket and secure it with the included screws. Ensure it fits snugly and covers all exposed wires.
7. Installing the Light Source
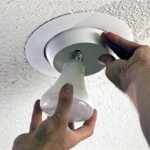
The type of light source (e.g., bulb, LED) will vary depending on the fixture. Follow the instructions to insert the appropriate bulbs or LED modules. If the fixture uses a transformer, ensure it's properly connected to the power supply.
8. Testing the Light
After completing the installation, restore power at the breaker panel. Turn on the light switch and check if the fixture illuminates properly. If not, recheck the connections and ensure all components are securely fastened.
9. Maintenance Tips
Regularly clean the fixture to maintain its appearance and performance. Use a soft, dry cloth to wipe down the surface. For bulbs, follow the recommended replacement schedule to ensure optimal lighting and extend the fixture's lifespan.
Conclusion
Installing ceiling light fixtures requires careful attention to the instructions. By following these essential aspects, you can ensure a safe, functional, and aesthetically pleasing installation. Remember to prioritize safety and consult an electrician if you encounter any difficulties or have concerns about electrical work.

Mounting Light Fixtures Fine Homebuilding

How To Install A Lighting Fixture Forbes Home

Mounting Light Fixtures Fine Homebuilding

How To Replace Install A Light Fixture The Art Of Manliness

How To Replace Install A Light Fixture The Art Of Manliness

How To Install A Ceiling Light Fixture Diy Family Handyman

How To Install A Ceiling Light Diy Playbook

Recessed Light Mounting Frame Spot Downlight Aluminium Ceiling Led Halogen Gu10 Mr16 Par16 Gu5 3 50mm 810s 2 China Lamp Bulb Made In Com

Artika Fm Hoc C Led Ceiling Light Fixture Instruction Manual

How To Replace A Light Fixture Planitdiy
Related Posts

