Essential Aspects of Ceiling Light Junction Box Installation
Installing a ceiling light junction box is a task that requires proper preparation and execution to ensure safety and functionality. This article will guide you through the essential aspects of this process, from selecting the right materials to completing the installation securely.
Material Selection
The first step is choosing the appropriate junction box. Junction boxes come in various sizes and shapes to accommodate different electrical needs. For ceiling lights, a 4-inch octagonal junction box is commonly used. It provides ample space for wire connections and supports the weight of the light fixture.
Additionally, you will need the following materials:
- Electrical wire
- Wire nuts
- Electrical tape
- Screwdriver
- Drill
Location and Mounting
Determine the desired location for the junction box, ensuring it aligns with the center of the light fixture. Mark the spot on the ceiling and drill a hole using a drill bit slightly smaller than the box diameter.
Insert the junction box into the hole and secure it with screws. The box should sit flush against the ceiling, providing a firm base for the light fixture.
Electrical Wiring
Connect the electrical wires from the ceiling to the junction box. The wires should be color-coded: white (neutral), black (hot), and green or bare copper (ground).
Strip approximately 1/2 inch of insulation from the ends of the wires. Twist the exposed wires together based on their color: white to white, black to black, and green to green or bare copper.
Secure the twisted wires with wire nuts and wrap them with electrical tape to prevent short circuits.
Light Fixture Installation
Connect the light fixture wires to the junction box wires. Follow the same color-coding rule as in the previous step. Twist the wires together, secure them with wire nuts, and insulate them with electrical tape.
Secure the light fixture to the junction box using the provided mounting hardware. Ensure the fixture is firmly attached and level.
Testing and Safety
Turn on the power and test the light fixture to confirm it operates correctly. If the light does not turn on, check the wire connections and ensure they are secure.
Always prioritize safety when handling electrical work. Turn off the power at the circuit breaker before starting the installation. Wear protective gloves and safety glasses to prevent electrical shocks or injuries.
Additional Tips
- Use a level to ensure the junction box is installed evenly.
- If you encounter any difficulties, consult a qualified electrician for assistance.
- Regularly inspect the junction box and wiring for any signs of damage or wear.
By following these essential aspects, you can confidently install a ceiling light junction box and enjoy the benefits of proper lighting in your home.

Installing Pendant Light In Ceiling Junction Box Doityourself Com Community Forums

Extending A Lighting Circuit Step By Guide And

Extending A Lighting Circuit Step By Guide And

Commercial Electric 5 In Mini Closet Light Led Flush Mount With White And Broe Trims Fits 3 4 Junction Boxes 7 Watt 6 Pack 564361410 6pk The Home Depot
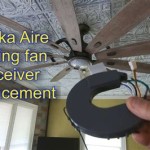
How To Replace A Light Fixture With Ceiling Fan Projects By Peter

Electric Box For Ceiling Fan Install Doityourself Com Community Forums

Help With Installing Overhead Lighting To Ceiling Junction Box R Askelectricians

How To Install An Electrical Box When There Is No Stud Mountyourbox

5 6 Disk Light Flush Mount Ceiling Recessed Lighting Parmida Led Technologies

Can This Electrical Box Hold A 23lb Ceiling Fan R Askanelectrician
Related Posts