Essential Aspects of Ceiling Light Replacement Lenses
Ceiling lighting plays a crucial role in illuminating your living spaces. When the lens covering your ceiling light fixture becomes damaged or cloudy, it can significantly affect the light output and the overall aesthetics of your room. Replacing the lens is essential to restore optimal light distribution and maintain the functionality and safety of your lighting system.
Here are some essential aspects to consider when choosing and replacing ceiling light replacement lenses:
Material
Replacement lenses are typically made from various materials, including glass, acrylic, and polycarbonate. Each material offers unique advantages and disadvantages:
- Glass: Glass lenses are durable and provide excellent light transmission, but they can be fragile and more expensive than other options.
- Acrylic: Acrylic lenses are lightweight, shatter-resistant, and cost-effective, making them a popular choice for many lighting applications.
- Polycarbonate: Polycarbonate lenses are highly resilient, impact-resistant, and can withstand harsh conditions, such as outdoor use.
Size and Shape
Lenses come in various sizes and shapes to accommodate different ceiling light fixtures. It is essential to measure the existing lens and the fixture opening to ensure the correct fit. Some common shapes include round, square, rectangular, and oval.
Light Transmission
The light transmission of a lens determines how much light passes through it. A higher light transmission value indicates that more light will be emitted from the fixture. Consider the desired light output when selecting a lens with appropriate light transmission properties.
Color Temperature
Replacement lenses can also affect the color temperature of the light they emit. Color temperature is measured in Kelvins (K) and ranges from warm (yellowish) to cool (bluish) tones. Choose a lens that complements the color temperature of the light source used in your fixture.
Installation
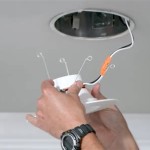
Before replacing a ceiling light lens, ensure you have the necessary tools and follow the manufacturer's instructions carefully. It is recommended to disconnect the power at the circuit breaker or fuse box before starting the process. Some lenses require simple snap-in installation, while others may need to be screwed or secured with adhesive.
By considering these essential aspects, you can select and replace ceiling light replacement lenses that provide optimal lighting performance, enhance the aesthetics of your space, and ensure the safety and functionality of your lighting system.

Eti 20 In Replacement Lens For Bright White Round Led Flush Mount Ceiling Light Fixture Sku 1000236762 95461824102 The Home Depot

Eti 20 In Replacement Lens For Bright White Round Led Flush Mount Ceiling Light Fixture Sku 1000236762 95461824102 The Home Depot

Ceiling Light Lens Wraparound Replacement Metalux Ws

Lithonia Lighting Dpuff Replacement Lens F Mfr No 10640 32 Geb Com

Pm 375 15c Clear Repl Lens Interior Ceiling Light Replacement Lenses

Lithonia Lighting 22 In X 46 24 Clear Replacement Lenses For 2gt440 T12 Troffer L2gt A12 The Home Depot

Ship Lithonia Lighting 4 Ft Replacement Lens Dsb48 271065 For

18w 24w 36w 48w 72w Optical Lens Led Light Plate Replacement Kit For Ceiling Driver Lazada Singapore

Fluorescent Light Fixture Replacement Lens 6 1 2 In X 48 Canac

Good Earth Lighting White Replacement Lens In The Fluorescent Parts Accessories Department At Com
Related Posts


