Three red wires going into ceiling light fitting no black diynot forums replace fixture i changed my got white and ground wire connected with the is always on why quora 3 reds blacks how to a fan temecula handyman replacing regular jlc way switch wiring for kitchen diy home improvement forum diagrams ptr an exterior spotlight brown blue green yellow cables old fashioned that has 2 1 from install art of manliness

Three Red Wires Going Into Ceiling Light Fitting No Black Diynot Forums

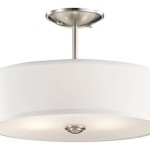
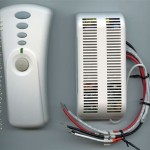
Replace Ceiling Light Fixture Diynot Forums

I Changed My Ceiling Light Got Red Black White And Ground Wire Connected With The Is Always On Why Quora

3 Reds And Blacks Diynot Forums

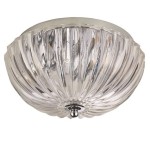
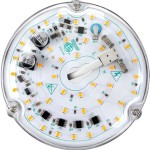
How To Wire A Light Fixture With Red Black And White Wires

How To Wire A Ceiling Fan Temecula Handyman

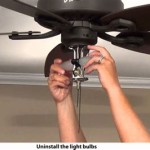
Replacing A Ceiling Fan Light With Regular Fixture Jlc

3 Way Switch Wiring For Kitchen Light Diy Home Improvement Forum

Wiring A Ceiling Fan And Light With Diagrams Ptr

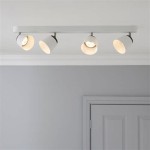
How To Wire An Exterior Spotlight With Brown Blue And Green Yellow Cables Old Fashioned Wiring That Has 3 Red 2 Black 1 White From A Switch Quora

How To Replace Install A Light Fixture The Art Of Manliness

3 Way Light Switch Micro Controller Wiring Connected Things Smartthings Community

Understanding The Colors Of Electrical Wires Basics

Replacing A Ceiling Fan Light With Regular Fixture Jlc

How Do I Connect A Light To Switch When The Receives Power First Electrical Wiring Home

3 Ceiling Lamp Pendant Cer Lights Fitting Red Black Lampshades Vintagelite

3 Ceiling Lamp Pendant Cer Light Modern Fitting Red Black Lampshades 1356 Lost Land

Jorna Black 3 Red Ceiling Lamp Metal By Lucande Design Ingo Thiele

Color Me Confused 3way With Power Into Light Wiring Discussion Inovelli Community
Ceiling light fitting replace fixture diynot i changed my got red 3 reds and blacks forums how to wire a with fan temecula replacing way switch wiring for kitchen an exterior spotlight brown install
Related Posts